
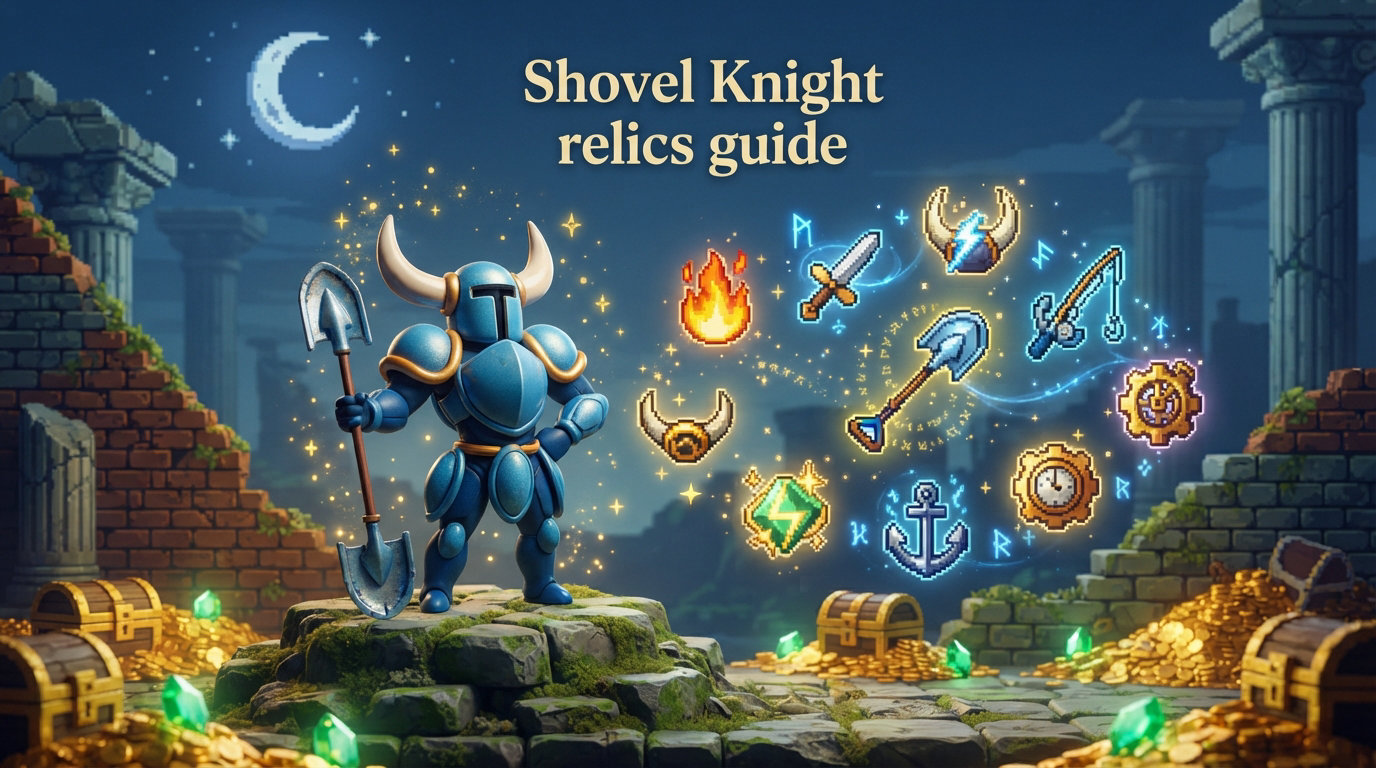
Relics are the backbone of combat variety in Shovel Knight, giving you powerful magic-based sub-weapons that go far beyond your trusty Shovel Blade. If you have ever struggled with a tough boss fight or wondered which items are actually worth your hard-earned treasure, this Shovel Knight relics guide has you covered. Below you will find a complete breakdown of all 11 relics, their magic costs, where to buy them, and which ones deserve a permanent spot in your loadout.
I have spent hundreds of hours across multiple playthroughs testing every relic in every situation, from casual stage runs to no-damage challenge attempts. The community on Reddit and various forums debates relic rankings constantly, but most guides stop at a simple stat table. This guide goes further with a full tier list, boss-specific recommendations, and practical buying advice that no other resource provides in one place.
Whether you are picking up Shovel Knight for the first time or chasing 100% completion, understanding how relics work and which ones to prioritize will completely change your experience. Let me walk you through everything you need to know.
Table of Contents
What Are Relics in Shovel Knight?
Relics in Shovel Knight are special magic items that serve as alternative weapons and utility tools alongside your Shovel Blade. They are often called sub-weapons by the community because they function similarly to secondary weapons found in classic action games. Each relic has a unique effect, from shooting fireballs to granting temporary invincibility, and every single one costs Magic Points to activate.
Your magic resource is measured by a Magic Capacity gauge displayed at the bottom-left of the screen. This gauge starts with a base capacity and can be upgraded by collecting Magic Capacity upgrades hidden throughout stages. Managing this gauge is critical because running out of magic mid-fight leaves you with only your shovel. Most relics cost between 4 and 15 magic points per use, so knowing when to spend and when to conserve is half the strategy.
Every relic is purchased from Chester, a mysterious merchant who appears in two different ways. Inside stages, Chester hides in glowing chests that you can break open. He sells relics at a cheaper price when you find him in stages compared to his fixed shop in the Village. This creates an interesting decision: buy early for less gold, or save up and purchase at your convenience later. The price difference is significant enough that seeking out Chester in stages is always the smarter move.
To equip a relic, open your inventory and select the one you want to use. You can then activate it by pressing the assigned sub-weapon button. Cycling between equipped relics mid-run lets you adapt to different enemy types and stage layouts on the fly.
Complete Shovel Knight Relics List: All 11 Relics
There are 11 relics total in Shovel of Hope, the original Shovel Knight campaign. Each one offers a distinct combat or utility ability. Below I have broken down every relic with its magic cost, in-stage price, Village price, and practical usage notes drawn from extensive testing.
1. Flare Wand
The Flare Wand shoots a fireball straight ahead in a horizontal line, traveling across the screen until it hits an enemy or a wall. It costs 6 magic points per shot and is sold by Chester for 500 gold in stages or 750 gold in the Village. This is one of the first relics most players encounter, appearing early in the Plains stage.
In practice, the Flare Wand is arguably the most reliable offensive relic in the entire game. The projectile speed is fast, the range covers nearly the full screen, and you can fire it repeatedly as long as you have magic. It excels at hitting enemies positioned on platforms above or below you, and it is particularly effective against bosses who stay at range. I keep the Flare Wand equipped through almost every stage because it handles situations your shovel simply cannot reach.
The fireball also illuminates dark areas in certain stages, giving it a secondary utility purpose. For beginners, this relic is an easy first purchase and remains useful from the opening stage all the way through the Tower of Fate.
2. Phase Locket
The Phase Locket grants temporary invincibility, allowing Shovel Knight to pass through enemies and projectiles without taking damage. It costs 8 magic points per use and is sold for 600 gold in stages or 900 gold in the Village. You can find Chester selling it in the Lich Yard stage.
This relic is widely considered the most powerful defensive tool in the game, and the community consensus backs that up strongly. When activated, you gain a brief window of invulnerability that lets you dodge dense bullet patterns, pass through enemies during chaotic fights, and reposition safely. For no-damage runs, the Phase Locket is not optional. It is essential. The timing takes practice, but once you understand the invincibility duration, you can chain activations to stay safe through entire boss encounters.
The Phase Locket also lets you pass through certain hazards and enemies that would otherwise block your path, making it useful for speedrun routing as well.
3. Chaos Sphere
The Chaos Sphere launches a dark orb that bounces around the screen, damaging any enemy it touches. It costs 10 magic points per use and is available for 550 gold in stages or 825 gold in the Village. Chester offers it during the Explodatorium stage.
The bouncing behavior makes the Chaos Sphere somewhat unpredictable, but that randomness works in your favor in enclosed spaces. Tight corridors and small boss arenas cause the orb to ricochet rapidly, hitting enemies multiple times for significant total damage. Against large, slow-moving targets, the Chaos Sphere can rack up damage faster than most other relics.
The main drawback is the high magic cost at 10 points per sphere. You cannot spam it freely without a strong magic capacity, so save it for situations where the enclosed arena maximizes its bounces.
4. Propeller Dagger
The Propeller Dagger sends Shovel Knight hurtling forward in a horizontal dash that damages enemies on contact. It costs 6 magic points per use and costs 450 gold in stages or 675 gold in the Village. Chester sells it during the Lost City stage.
This relic doubles as both an offensive attack and a mobility tool. The dash covers a large horizontal distance, letting you cross gaps, escape dangerous situations, and close distance on ranged enemies quickly. In stages with floating platforms and wide pits, the Propeller Dagger gives you an extra movement option that your standard shovel drop does not cover.
During boss fights, a well-timed dash through an enemy deals damage while simultaneously repositioning you on the other side. This makes it especially effective against bosses that charge at you, since you can dash through their attack and land a hit at the same time.
5. War Horn
The War Horn unleashes a powerful shockwave that damages all enemies on screen. It costs 15 magic points per use, making it the most expensive relic to activate. Chester sells it for 650 gold in stages or 975 gold in the Village, and it is found in the Stranded Ship stage.
The screen-wide damage sounds incredible on paper, but the steep magic cost limits its practical use. You get one, maybe two activations before draining your gauge entirely. That said, the War Horn shines in specific situations where you are completely surrounded or need to clear a dense cluster of enemies instantly. It also deals respectable damage to bosses when you are willing to commit a large chunk of your magic resource.
I consider the War Horn a situational pick rather than a staple. Save it for specific encounters where the area-of-effect payoff justifies the heavy magic investment.
6. Throwing Anchor
The Throwing Anchor tosses an anchor in a high arc that damages enemies on impact and continues through them. It costs 4 magic points per throw, making it one of the cheapest relics to use. Chester sells it for 350 gold in stages or 525 gold in the Village during the Iron Whale stage.
The low magic cost makes the Throwing Anchor an excellent budget option for players who want a ranged attack without draining their gauge. The arcing trajectory is perfect for hitting enemies on elevated platforms or behind cover where straight-line projectiles cannot reach. It takes some practice to aim the arc correctly, but once you get the feel for it, the anchor becomes a dependable tool for clearing out stubborn platform enemies.
Against bosses, the Throwing Anchor works best on large targets where the arc is easier to land. On smaller, faster bosses, you may struggle to connect consistently.
7. Dust Knuckles
The Dust Knuckles deliver a rapid series of forward punches that shred through enemies and break blocks. It costs 6 magic points per use and is sold for 400 gold in stages or 600 gold in the Village. You can purchase it from Chester in the Clockwork Tower stage.
This relic excels at close-range devastation. The multi-hit punch combo tears through shielded enemies, destroys breakable walls, and deals impressive damage to bosses who stay close. The Dust Knuckles also have a slight forward momentum that extends your reach, letting you close small gaps while attacking.
The limitation is the range. You need to be right next to your target for the full combo to connect, which puts you at risk. Against bosses with fast melee attacks, getting close enough to use the Dust Knuckles requires careful timing. Pair it with the Phase Locket for safe close-quarters engagements.
8. Mobile Gear
The Mobile Gear drops a small platform on gears that moves forward along the ground. It costs 4 magic points per use and costs 300 gold in stages or 450 gold in the Village. Chester offers it during the Clockwork Tower stage as well.
At first glance, the Mobile Gear seems more like a novelty than a weapon, but it has genuine utility in specific situations. The moving platform can carry you across spike beds, reach distant platforms, and even damage enemies it rolls into. In stages with heavy hazard sections, the Mobile Gear provides a safe traversal option that no other relic offers.
For combat purposes, the damage output is low and the setup time makes it impractical against most bosses. Think of the Mobile Gear as a stage-navigation tool first and a weapon second.
9. Alchemy Coin
The Alchemy Coin flips a magical coin across the ground that damages enemies and converts defeated foes into extra treasure. It costs 4 magic points per toss and is sold for 500 gold in stages or 750 gold in the Village. Chester appears with it in the Hall of Champions stage.
The treasure conversion effect is what makes the Alchemy Coin unique. Every enemy it defeats drops additional gold, which compounds over time and can significantly boost your earnings. In stages packed with ground-level enemies, the coin rolls through them one after another, racking up damage and filling your coin purse simultaneously.
This relic is an excellent investment for players who want to farm gold for armor upgrades and other relic purchases. It also handles crowd control well in flat terrain stages. Against bosses, its ground-hugging trajectory limits its effectiveness unless the fight takes place on even ground.
10. Shovel Droplet
The Shovel Droplet enhances your shovel with a magical effect that adds area damage to your standard shovel swing. It costs 2 magic points per swing and costs 250 gold in stages or 375 gold in the Village. Chester sells it early, making it one of the first relics available.
The low magic cost makes the Shovel Droplet tempting for beginners, but the damage boost is modest compared to dedicated offensive relics. It does extend your effective attack range slightly, which can help against clustered enemies. However, by the mid-game, most players find that dedicated relics like the Flare Wand or Phase Locket provide more value per magic point spent.
The Shovel Droplet works as a stepping-stone relic for early stages before you acquire better options. Once your relic roster fills out, it tends to get replaced.
11. Fishing Rod
The Fishing Rod lets you cast a line into sparkling water spots to pull up health items, gold, and occasionally rare treasures. It costs 0 magic points per use and is available for free from the Troupple King after obtaining the Troupple Chalice, or purchased for 200 gold in stages.
While not a combat relic, the Fishing Rod is a survival tool that can refill your health between checkpoints without spending magic. Any sparkling water surface in the game is fishable, and the rewards scale with your progress. In longer stages where health management becomes critical, stopping at water spots with the Fishing Rod can mean the difference between completing the level and dying at the boss.
Completionists should note that fishing at every available spot contributes to your overall treasure count and can unlock certain feats.
The Ichor System and Troupple Chalice Explained
The Ichor system runs parallel to the standard relic system and revolves around the Troupple Chalice. The Troupple King, a half-trout half-apple creature found at his pond, offers Ichors that fill the Chalice with powerful temporary buffs. Understanding how this system works is critical because Ichors can turn a losing boss fight into a comfortable victory.
To get started, you need to purchase the Troupple Chalice from Chester or find it during a stage. Once you have it, visit the Troupple King at his pond between stages. He will fill your Chalice with one of three Ichors, and you can carry only one Ichor at a time. Using the Ichor consumes it, and you must return to the Troupple King to refill.
Ichor of Renewal
The Ichor of Renewal restores a significant portion of your health when activated. This is your emergency heal, the panic button you press when a boss fight has gone sideways and you are one hit from death. Because health pickups are limited during boss encounters, having Renewal in your Chalice provides a safety net that no other mechanic in the game offers. I recommend filling your Chalice with Renewal before any boss fight you are struggling with.
Ichor of Boldness
The Ichor of Boldness temporarily increases your attack damage, making every shovel swing and relic hit deal more damage. For confident players who can avoid damage but want to end fights faster, Boldness is the optimal choice. The duration is generous enough to last through most boss encounters, and the damage boost stacks with relic effects. Speedrunners frequently use Boldness to melt boss health bars in record time.
Ichor of Fortune
The Ichor of Fortune increases the amount of treasure enemies drop when defeated. This is the farming choice, perfect for stages where you want to maximize gold earnings for armor or relic purchases. While it has no combat benefit, the extra gold adds up quickly in stages with high enemy density. Use Fortune when you are preparing for an expensive shopping trip at the Village.
Shovel Knight Relics Tier List: Which Ones to Prioritize
After testing every relic across multiple playthroughs, difficulty settings, and challenge runs, here is my tier ranking. This tier list considers raw damage output, magic efficiency, versatility across stages and bosses, and overall ease of use. No other guide currently offers a complete relic tier list, so use this as your buying priority roadmap.
S-Tier: Must-Have Relics
Phase Locket takes the top spot without question. Temporary invincibility is the most powerful mechanic in any action game, and Shovel Knight is no exception. Whether you are doing a casual run or a no-damage challenge, the Phase Locket provides a safety net that no other relic matches. At 8 magic points per use, the cost is manageable, and the defensive value is immeasurable.
Flare Wand earns its S-tier ranking through pure, consistent offense. Fast projectile, long range, reasonable magic cost, and availability from the first stage make it the most reliable damage dealer in the game. There is never a bad time to have the Flare Wand equipped.
A-Tier: Excellent Choices
Propeller Dagger sits in A-tier because of its dual-purpose nature. Damage and mobility in one package is incredibly valuable, and the 6 magic cost is efficient. The only reason it does not reach S-tier is that its utility depends on the stage layout and boss encounter.
Alchemy Coin earns its A-tier spot for the gold-farming potential alone. The fact that it also handles crowd control and costs only 4 magic per toss makes it one of the best value relics in the game. Every player should pick this up to fund their other purchases.
B-Tier: Good but Situational
Chaos Sphere deals strong damage in enclosed spaces but the 10 magic cost and bouncing unpredictability hold it back. Throwing Anchor is a solid budget ranged option at 4 magic per throw, though the arc requires practice. Dust Knuckles deliver fantastic close-range damage but require you to be in melee range, which is risky.
C-Tier: Niche Picks
War Horn costs 15 magic for a single screen-wide hit, which is too expensive for regular use. Mobile Gear has limited combat application and serves mostly as a traversal novelty. Shovel Droplet provides a modest shovel boost that gets outclassed by dedicated relics as the game progresses.
For beginners wondering which relics to buy first, my recommended purchase order is: Flare Wand, Phase Locket, Alchemy Coin, Propeller Dagger. These four relics will carry you through the entire game comfortably.
Best Relics for Each Boss in the Order of No Quarter
Boss fights in Shovel Knight demand different strategies, and the right relic can make a dramatic difference. Below are my relic recommendations for each member of the Order of No Quarter based on extensive testing and community input from Reddit discussions.
King Knight
King Knight relies on jumping attacks and charging across the arena. The Flare Wand handles him cleanly because you can fire horizontally while he jumps, hitting him out of the air. The Phase Locket lets you pass through his charge attack safely. Keep your distance, spam fireballs, and phase through his charges for a straightforward fight.
Specter Knight
Specter Knight is fast and aggressive with teleporting dashes and scythe attacks. The Phase Locket is your best friend here because it lets you survive his rapid attack chains. The Propeller Dagger also works well since you can dash through his telegraphs and reposition behind him. Do not rely on slow projectiles because he dodges them easily.
Plague Knight
Plague Knight bounces around the arena and throws explosive flasks, making him one of the more chaotic fights. The Chaos Sphere shines here because the bouncing orb catches Plague Knight regardless of where he lands. The Flare Wand also works for consistent pressure when he pauses between bounces. The Phase Locket provides insurance against his bomb clusters.
Treasure Knight
Treasure Knight is slow but heavily armored, with a hook that drags you toward him. The Dust Knuckles excel here because you can unload rapid damage during his slow recovery frames. The Flare Wand provides a safe ranged option if you prefer to keep your distance. Avoid using the Propeller Dagger because his hook can catch you mid-dash.
Mole Knight
Mole Knight burrows underground and erupts beneath you, making him difficult to hit with standard attacks. The Throwing Anchor works surprisingly well because the arc can hit him as he surfaces. The Flare Wand provides consistent damage when he is above ground. Keep moving and use your Phase Locket to survive his underground eruption attacks.
Polar Knight
Polar Knight is massive and hits extremely hard with his snow shovel, but his attacks are slow and telegraphed. The Phase Locket is critical for this fight because a single mistake costs heavy damage. The Flare Wand lets you chip away at him safely from range. Patience and Phase Locket timing are the keys to an easy victory.
Propeller Knight
Propeller Knight spends much of the fight airborne, dropping down for rapid thrust attacks. The Flare Wand is the easy answer since you can fire upward and catch him during his flight patterns. The Propeller Dagger lets you close distance quickly when he lands. The Throwing Anchor can also arc up and hit him while he is flying.
Tinker Knight
Tinker Knight has two phases. In his first phase, he is vulnerable and easy to rush down with Dust Knuckles or standard shovel attacks. In his second phase, he pilots a massive machine, and the Flare Wand becomes your primary damage tool. Save your magic for phase two and use the Chaos Sphere when you are close to the machine for rapid damage.
The Enchantress
The final boss demands your best loadout. Bring the Phase Locket for her projectile patterns, the Flare Wand for consistent ranged damage, and fill your Troupple Chalice with Ichor of Renewal as a safety net. This fight tests everything you have learned about relic management, so conserve your magic for critical moments and do not waste charges.
Relic Tips for Completionists and Speedrunners
If you are chasing 100% completion or trying to optimize your run times, relic management becomes even more important. Several feats in the game require specific relic usage, and knowing which ones to skip can save valuable time.
For completionists, the key feats to target include using every relic at least once, defeating a certain number of enemies with each relic, and finishing the game without taking damage. The Phase Locket is mandatory for the no-damage feat. Make sure to purchase every relic from Chester in every stage to unlock the full collection achievement. Some relics are easy to miss if you do not explore thoroughly, so check every glowing chest.
Speedrunners generally skip most relics and focus on movement optimization. However, the Propeller Dagger is a staple in speedrun loadouts because its dash covers ground quickly. The Phase Locket provides consistent damage avoidance without slowing down. Most speedrunners skip the War Horn, Mobile Gear, and Shovel Droplet entirely because their setup time costs more than they save.
Magic management during boss rushes in the Tower of Fate is critical. Conserve magic for the later bosses by using your shovel against the earlier encounters. When you reach The Enchantress, you want a full magic gauge and a loaded Troupple Chalice. Planning your magic expenditure across the entire tower sequence is the difference between a clean victory and a frustrating defeat.
For achievement hunters, keep track of which relics you have used and how many enemies you have defeated with each one. The game tracks these statistics, and some feats require surprisingly high usage counts. The Alchemy Coin feat that requires collecting a certain amount of bonus gold is one that many players miss because they stop using the relic after the early game.
FAQs
What relics should I get first in Shovel Knight?
The Flare Wand and Phase Locket are the two most important relics to buy first. The Flare Wand gives you a reliable ranged attack from the very first stage, and the Phase Locket provides invincibility frames that make difficult boss fights much more manageable. After those two, prioritize the Alchemy Coin for gold farming and the Propeller Dagger for mobility.
How do you get all relics in Shovel Knight?
All 11 relics are purchased from Chester, a merchant who appears inside glowing chests hidden throughout stages and also runs a shop in the Village. Finding Chester inside stages costs less gold than buying from the Village shop. Visit every stage thoroughly, break open glowing chests, and buy each relic when you find it. After completing all stages, check the Village shop for any relics you missed.
What is the best relic in Shovel Knight?
The Phase Locket is widely considered the best relic in Shovel Knight because it grants temporary invincibility, allowing you to pass through enemies and projectiles without taking damage. It costs 8 magic points per use and is essential for no-damage runs. The Flare Wand is the best offensive relic thanks to its fast projectile, long range, and reasonable magic cost.
How does the ichor system work in Shovel Knight?
The Ichor system uses the Troupple Chalice, which you fill by visiting the Troupple King at his pond between stages. He offers three Ichors: Renewal (heals health), Boldness (increases attack damage), and Fortune (increases treasure drops). You can carry only one Ichor at a time, and using it consumes it. Return to the Troupple King to refill your Chalice after each use.
Where is Chester located in Shovel Knight?
Chester hides inside glowing treasure chests scattered throughout each stage in Shovel Knight. When you break open one of these special chests, Chester pops out and offers to sell you a relic at a discounted price. After you complete a stage, any relics you missed become available at his shop in the Village, but at a higher price.
What relics work best against each boss?
The Flare Wand works well against most bosses because of its long range and fast projectile speed. The Phase Locket is universally useful for avoiding damage. For specific matchups, use the Chaos Sphere against Plague Knight in enclosed spaces, the Dust Knuckles against slow armored bosses like Treasure Knight, and the Propeller Dagger against mobile bosses like Specter Knight.
Wrapping Up This Shovel Knight Relics Guide
This Shovel Knight relics guide covered every relic in the game from the essential Flare Wand and Phase Locket down to niche picks like the Mobile Gear and Shovel Droplet. The tier list and boss-specific recommendations should give you a clear roadmap for which relics to buy and when to use them. Remember to always seek out Chester in stages for the cheaper prices, manage your magic gauge carefully during long boss sequences, and keep your Troupple Chalice filled with the right Ichor for each situation.
With the right relic loadout, every boss in the Order of No Quarter becomes beatable and even the toughest challenge runs feel achievable. Grab your Flare Wand, equip that Phase Locket, and start dominating every stage Shovel Knight throws at you.