
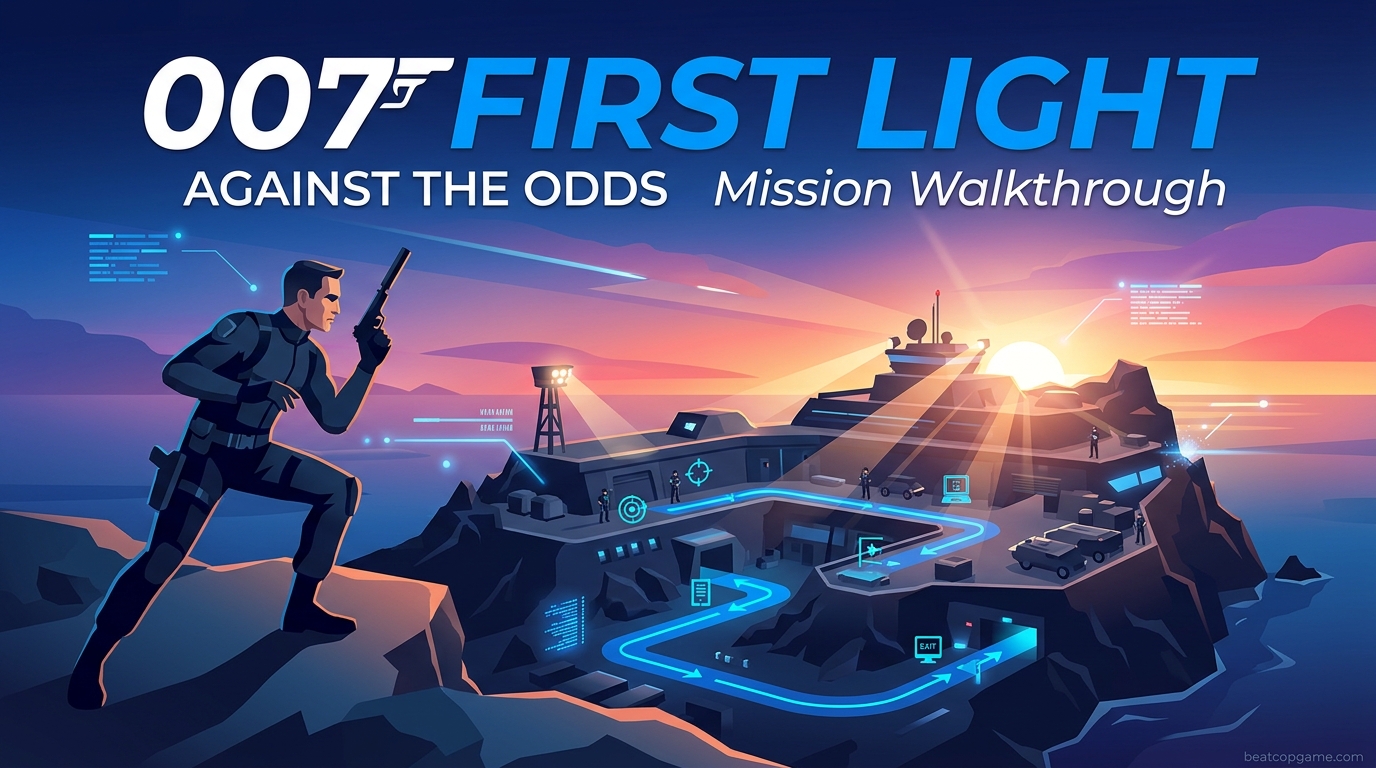
If you just picked up 007 First Light and landed on the Against the Odds mission, you are in the right place. This prologue drops you into the boots of a young James Bond on his first real field operation in Iceland, and it sets the tone for everything that follows. I have played through this mission multiple times on every difficulty setting, testing different approaches and routes, and this walkthrough covers every checkpoint, every challenge, and every collectible you need to find.
The Against the Odds mission is where IO Interactive teaches you the core mechanics that carry through the entire game. Stealth takedowns, environmental exploration, quicktime events, and distraction systems all get introduced here in a way that feels natural rather than forced. If you are wondering how long it takes to beat 007 First Light, the full campaign runs several hours, but this prologue mission alone takes about 40 minutes on your first playthrough.
Whether you are going for a clean stealth run or trying to knock out all 9 challenges in as few runs as possible, this guide has you covered. I will walk you through each section step by step, flag the challenge opportunities as they come up, and point out every collectible along the way. I have also included a multi-run strategy near the end that shows you how to group challenges efficiently so you do not waste time replaying sections you have already mastered.
Table of Contents
Against the Odds Mission Overview
Against the Odds is the prologue mission in 007 First Light. It takes place in Iceland and follows a young James Bond as he infiltrates a militia camp to rescue hostages and gather intelligence. The mission serves as the game’s tutorial, introducing stealth mechanics, takedowns, exploration, and quicktime events that you will use throughout the rest of the campaign.
Here is what you need to know before you start:
- Location: Iceland militia camp
- Estimated time: 35-45 minutes on first run, 20-25 minutes on repeated runs
- Checkpoints: Multiple checkpoints with chapter select available after completion
- Challenges: 9 optional challenges (some are mutually exclusive, requiring multiple runs)
- Collectibles: 4 collectible items including Legacy items, Mementos, and a Postcard
- Recommended difficulty: Operative (normal) for first run to learn the layout
The mission is split into several distinct phases. You start with an aerial insertion, move through the outer camp perimeter, search for intel in a guarded building, get poisoned and scramble for an antidote, rescue hostages from two separate shipping containers, and finally escape in a chaotic extraction sequence that shifts the gameplay from stealth to full action. Each phase has its own checkpoint, so you can replay specific sections later without starting from the beginning.
One important detail to understand upfront: some challenges conflict with each other and cannot be completed in the same run. For example, the Pacifist challenge (no kills) directly conflicts with the Assault challenge (eliminate all enemies). I will cover a multi-run strategy in the challenges section below so you can plan your approach and minimize the number of replays needed.
The community reception for this mission has been overwhelmingly positive. Many players on Reddit describe 007 First Light as the best Bond game since GoldenEye, and IO Interactive’s reputation for the Hitman series shines through in the stealth design. The game feels like a mix of Hitman’s methodical infiltration and Uncharted’s cinematic set pieces, and Against the Odds is the perfect introduction to that blend.
007 First Light Against The Odds Mission Walkthrough
This is the complete step-by-step walkthrough for the Against the Odds mission. I have organized it into six distinct parts that match the mission’s natural progression and checkpoints. Each section includes stealth tips, challenge opportunities, and collectible locations so you can tackle everything in the most efficient order possible.
Part 1: Reach the Camp (Night Flyer)
The mission opens with Bond descending from above into the Icelandic valley. You will ride a zipline or parachute down toward the militia camp below, and this opening sequence is where the game teaches you basic movement controls, crouching, and the fundamentals of staying hidden. The Night Flyer challenge is directly tied to this descent phase, so pay close attention to your approach from the moment your feet touch the ground.
As you land, crouch immediately and move into the tall grass nearby. The tall grass is your most reliable tool throughout this entire mission. It conceals you from guards and lets you reposition freely without being spotted. Think of it as your safe zone. Any time things go wrong, retreat to the nearest patch of tall grass and wait for the alert to die down.
Take out the first guard using a stealth takedown from behind. The game prompts you with the correct button, and the timing window is generous on Operative difficulty. After the takedown, you need to drag the body into the grass or behind cover. Leaving bodies in the open will cause other guards to discover them and trigger an alert, which can ruin your Ghost and Pacifist challenge runs.
Move along the ridge line toward the camp perimeter. You will encounter two more guards patrolling near a chain-link fence. These guards follow a synchronized patrol pattern where they walk toward each other, pause, then turn and walk apart. Wait for them to separate, then take down the lone guard first. Drag his body into the tall grass immediately. The second guard follows a predictable loop that takes about 15 seconds, so time your takedown for when he turns away from you.
Once both fence guards are down, you have a clear path to the camp entrance. There is one final guard standing near the gate who faces inward toward the camp. You can sneak past him on the left side using a drainage ditch, or take him down if you want to be thorough. Either way, proceed through the gate to trigger the next checkpoint and move into Part 2.
Night Flyer Challenge: To complete this challenge, you need to reach the camp entrance without being detected during the entire descent and approach phase. Stay low, use the tall grass consistently, and avoid sprinting anywhere near guards. The noise from sprinting travels further than you might expect. If you trigger an alert at any point during this phase, reload the last checkpoint rather than trying to recover, because the challenge will already be failed.
Part 2: Search the Room (Room A2)
Once you breach the outer perimeter of the camp, your objective updates to search Room A2 for intelligence. Room A2 is a small prefab building on the east side of the camp. The door is unlocked, but there is a guard posted just outside who patrols a tight loop around the building. His patrol takes about 20 seconds to complete a full cycle.
Approach Room A2 from the south side using the cover of stacked supply crates. Wait for the guard to face away from the door, then slip inside quickly. The room contains documents spread across a desk, a laptop you can interact with, and a wall-mounted map that shows the camp layout. Grab the intel from the desk and read the documents on the laptop. They mention a prisoner transfer schedule and a chemical substance labeled BT65, which becomes relevant later in the mission.
Before leaving Room A2, check the back corner near the window. The 7 of Acorns playing card is sitting on a shelf behind a stack of supply boxes. This is one of the Legacy collectibles in the mission, and it is very easy to miss because the shelf is partially hidden by the boxes. Move the camera around the room slowly to make sure you spot it. Picking this up now saves you from having to replay the entire section later for the Completionist challenge.
There is also a disguise opportunity in this area that is worth considering. If you take down the guard outside Room A2 silently and drag his body inside, you can take his militia uniform. The disguise lets you walk through certain areas of the camp without raising immediate suspicion. However, it has limitations. Guards at close range will recognize you are not one of them, and the disguise does not work near the command tent or the hostage containers. Still, for the central camp section, it can save you from several tricky stealth encounters.
If you decide to use the disguise, remember that you can only carry one disguise at a time, and changing clothes makes noise that nearby guards can hear. Pick your moment carefully. The disguise also degrades over time in certain weather conditions, though this is not a major factor during the Iceland mission since the weather remains consistent throughout.
Part 3: Search the Central Camp
With the intel from Room A2, your next objective sends you deeper into the central camp. This is the largest and most complex section of the entire mission. The central camp is where the militia has established their command structure, and it features the highest concentration of guards, the most patrol overlap, and several environmental features you can use to your advantage.
Move through the camp using tents, vehicles, and shipping containers as cover. The guard patrol patterns in the central camp are significantly more complex than the outer perimeter. I strongly recommend taking your time here and observing each patrol route for at least 30 seconds before making any moves. There are usually brief windows of 2-3 seconds where a guard’s back is turned, which gives you just enough time to slip past or execute a takedown.
Inside one of the central tents, you will find documents about an antidote supply. Reading these documents triggers the next major story beat. During a scripted confrontation in the command tent, Bond gets poisoned. This event is unavoidable and happens regardless of your stealth approach up to this point. After the poisoning, you have a limited time window to find the antidote before the effects become fatal.
The screen starts to blur and your movement speed drops significantly, which creates genuine tension. The poison effect also distorts the audio, making it harder to hear guard movements. Despite the added pressure, the timer is generous. You have enough time to reach the antidote even if you take a slightly longer route.
Antidote Location: The antidote is stored in a medical cabinet inside the main command tent at the center of the camp. The command tent is larger than the others and has a radio antenna on top, making it easy to identify. Two soldiers guard the entrance. The most reliable approach is to use a distraction. Throw a bottle toward the east side of the tent or interact with a radio on a nearby table to draw one guard away. Deal with the remaining guard with a quick takedown, then enter the tent and grab the antidote from the green medical cabinet. Administer it immediately. If you played through the camp methodically, you should already be within 30 seconds of the command tent when the poisoning occurs.
Scenic Route Challenge: Instead of taking the direct path through the center of the camp toward the command tent, look for an alternate route along the cliff edge on the western side. This path starts behind a stack of crates near the camp’s western fence. It is longer and requires some climbing along rock faces, but it lets you bypass four separate guard encounters entirely. The Scenic Route challenge specifically requires you to take this alternate path from the camp entrance all the way to the command tent without touching the main path.
After Bond recovers from the poison, you learn from the documents that hostages are being held in two shipping containers marked B4 and G9 on opposite sides of the camp. Your objectives update to rescue the hostages from both containers before making your escape.
Part 4: Save the Captives (Container G9)
Container G9 is located in the southern section of the camp, past the motor pool area. It is guarded by three soldiers who patrol around it in a loose triangle formation. The container itself has a red control panel mounted on the outside that you need to interact with to release the electronic lock on the door.
Before heading to container G9, make a detour to Tent A4 on the south side of the motor pool. Inside Tent A4, you will find the Iceland Postcard sitting on a folding table between two cots. This is one of the Postcard collectibles in the mission. The tent is unguarded, so grab it quickly and continue toward G9. If you skip this now and come back later, the guard activity around the motor pool may have increased.
The best approach for container G9 is to circle around to the back of the container where the guards have limited visibility. There is a stack of metal crates you can climb to get on top of the container roof. From this elevated position, you can observe all three guards and plan your takedowns. Drop down on the nearest guard for an aerial takedown, then immediately move toward the second guard before he can react to the noise. The third guard usually investigates the commotion, walking directly toward your position, which gives you a clean ambush opportunity.
Full Of Surprises Challenge: This challenge requires you to use environmental hazards against enemies at least twice during the mission. Near container G9, there is an ATV parked next to a fuel canister. Sabotage the ATV by interacting with its engine. When a guard eventually walks past and notices the damaged vehicle, the resulting explosion from the fuel canister takes him out. You can also use the radio in the nearby guard tower to broadcast static, which draws guards to investigate and creates a distraction. Both of these count toward the Full Of Surprises challenge.
Once the guards around G9 are cleared, interact with the red control panel on the side of the container. The door slides open with a loud mechanical groan, but no additional guards are close enough to hear it. The hostages inside will thank Bond and move to a hiding spot behind the container. One set of hostages rescued, one more to go.
Part 5: Save the Captives (Container B4)
Container B4 is in the northern section of the camp, and it presents a tougher challenge than G9. Four soldiers patrol around it in overlapping routes, and there is a guard tower nearby with a spotter equipped with binoculars. The spotter’s elevated field of vision covers most of the main approach path to B4, which makes a direct stealth approach nearly impossible without dealing with him first.
Start by eliminating the spotter. Circle around to the back side of the guard tower where a ladder is shielded from his line of sight. Climb the ladder slowly and perform a silent takedown at the top. The spotter drops without making a sound. This removes the overhead surveillance and opens up your approach options significantly. You can now move through the main path without being spotted from above.
High Ground Challenge: To complete this challenge, you need to perform takedowns from elevated positions at least three times during the mission. The guard tower takedown here counts as one. If you also performed the aerial takedown from the container roof near G9 and another elevated takedown during the camp approach in Part 1, this challenge completes here. If you are short on elevated takedowns, climb onto the nearby shipping containers and drop down on a passing guard for your third.
For the four ground-level guards around B4, I recommend using distractions to split them into smaller groups. There is a yellow control panel mounted on a pole near container B4 that activates a nearby crane. Hit the control panel and two guards will break from their patrol to investigate the crane movement. Take them down while they are separated from the other two. Then handle the remaining guards using the same distraction strategy, or use the disguise from Room A2 if you still have it active.
The Cruciform Key collectible is located inside container B4, resting on a small metal table near where the hostages are sitting. This key is a Legacy item and is very easy to miss if you rush through the rescue dialogue. The hostages start talking as soon as you open the container, and the key is partially obscured by the hostages’ shadows. Make sure to pick it up before you leave the area.
Before leaving the B4 area entirely, check the narrow gap between two shipping containers stacked nearby. The Satellite Part is wedged between the containers at ground level and can be extremely hard to spot from a normal walking pace. Crouch down and look into the gap between the containers. The collectible has a faint glow that is only visible when you are close. This is one of the Memento collectibles and is considered the most missable item in the entire mission.
Part 6: Escape and Extraction
With both sets of hostages freed from containers G9 and B4, the mission shifts into its final and most chaotic phase: the escape. The militia is now fully aware of your presence, and the entire camp goes on high alert. Red emergency lights activate, guards abandon their patrol routes and converge on your last known position, and the gameplay shifts dramatically from careful stealth to fast-paced action.
Your escape route takes you north through the valley toward the extraction point. ATVs will pursue you along the valley floor, and you need to sabotage them as you run. The ATV chase sequence involves a series of quicktime events where Bond dodges incoming fire, leaps between rocks and obstacles, and disables pursuing vehicles by shooting their tires or using the environment.
The quicktime events during the chase are straightforward but require quick reflexes. The button prompts appear on screen for about one second on Operative difficulty, which is enough time if you are paying attention. On harder difficulties, the window shrinks to roughly half a second, making this section considerably more challenging. If you fail a quicktime event, Bond takes damage but does not die immediately. However, for the 00 To Become challenge, any failed quicktime event means starting over.
When you reach the communications mast at the northern edge of the camp, climb the ladder bolted to its side to reach the top platform. There is a mast wire stretching across the valley that Bond can use as a makeshift zipline. This is one of the most cinematic moments in the entire mission, and it triggers another sequence of quicktime events with precise timing requirements.
The zipline quicktime events test your ability to maintain balance while dodging obstacles. Watch for the on-screen prompts and respond quickly. The timing is tight but consistent. Once you learn the pattern, it becomes muscle memory on repeated runs. After the zipline, Bond lands near the extraction vehicle and the mission concludes with a brief cutscene.
00 To Become Challenge: This is arguably the hardest single challenge in the mission. It requires you to complete the entire escape sequence without taking any damage. This means hitting every quicktime event perfectly during the ATV chase and the zipline sequence, and avoiding all enemy fire throughout. I recommend attempting this on a dedicated run where you focus solely on this objective. Use Operative difficulty for the most forgiving timing windows, and do not worry about stealth or collectibles during this run.
After the zipline sequence concludes, Bond reaches the extraction point and the mission formally ends. You get a detailed score screen showing your overall performance rating, which challenges you completed, which ones you missed, and which collectibles you found. This screen also shows your completion time, which is useful for planning speedrun attempts. If you missed any challenges, the game highlights them and suggests which chapter to replay, which is a nice touch that saves you from guessing.
All 9 Against the Odds Challenges
The Against the Odds mission contains 9 optional challenges that add significant replay value. Some can be completed together in a single run, but others are mutually exclusive by design. Understanding which challenges conflict with each other is essential for planning efficient completion runs.
Here are all 9 challenges with descriptions:
- 1. Pacifist: Complete the entire mission without killing any enemies. You must use non-lethal takedowns exclusively. This means pressing the takedown button gently rather than holding it, since holding it performs a lethal takedown.
- 2. Ghost: Complete the mission without ever being detected by enemies. Stay out of sight lines, avoid making noise near guards, and do not trigger any alert phases.
- 3. Assault: Eliminate every enemy soldier in the mission. Go loud, engage every patrol, and leave no one standing. This challenge requires an aggressive combat approach.
- 4. No Help Needed: Rescue all hostages from both containers without any hostage taking damage. Enemies near the containers may fire at hostages during combat, so clear the area before opening the containers.
- 5. High Ground: Perform at least 3 takedowns from elevated positions such as guard towers, container roofs, or cliff edges. Aerial takedowns count toward this challenge.
- 6. Scenic Route: Take the alternate cliff-edge path through the western side of the central camp instead of the main path. The route starts behind the crate stack near the western fence.
- 7. Full Of Surprises: Use environmental hazards against enemies at least 2 times. Sabotaging the ATV near G9 and using the crane near B4 both count.
- 8. 00 To Become: Complete the entire escape sequence from the alert trigger to extraction without taking any damage. Perfect quicktime event execution is required.
- 9. Completionist: Find all 4 collectibles in a single run. This includes the 7 of Acorns, Iceland Postcard, Cruciform Key, and Satellite Part.
Multi-Run Strategy
Because some challenges fundamentally conflict with each other, you need at least two complete runs to earn all 9. After extensive testing, here is the most efficient strategy I have found:
Run 1 (Stealth Focus): Aim for Pacifist, Ghost, Scenic Route, High Ground, and Completionist. Use only non-lethal takedowns throughout the entire mission, never let enemies spot you, take the cliff-edge path through the central camp, perform takedowns from elevated positions whenever possible, and collect every item in a single pass. This run is slower and more methodical. Expect 45-50 minutes depending on how careful you are with patrol timing. The key to this run is patience. Rushing through patrol areas is the fastest way to get spotted and ruin both the Ghost and Pacifist challenges simultaneously.
Run 2 (Action Focus): Aim for Assault, No Help Needed, Full Of Surprises, and 00 To Become. Go loud from the start, eliminate every enemy you encounter, protect the hostages during the rescue sequences, use environmental kills near G9 and B4, and nail every quicktime event during the escape. This run is faster and more aggressive. Expect 25-30 minutes since you are not waiting for patrol patterns. The key to this run is efficiency. Move quickly between groups of enemies and use the environmental hazards early to rack up Full Of Surprises progress.
The important insight is that Pacifist and Ghost pair naturally together. If you are successfully avoiding kills, you are almost certainly staying hidden. These two challenges effectively reinforce each other. On the flip side, Assault pairs naturally with Full Of Surprises because environmental kills count toward the Assault body count while simultaneously ticking off the Full Of Surprises requirement.
The only challenge that does not neatly fit into either run is No Help Needed. You can attempt it in either run, but it is slightly easier during the action run because you will be clearing enemies near the containers before opening them, which reduces the risk to hostages.
Tips for Challenge Completion
Use the chapter select feature in the main menu to replay specific sections instead of running the entire mission again. The checkpoint system lets you jump directly to the escape sequence for 00 To Become, or back to the central camp for Scenic Route, or to the hostage sections for No Help Needed. This saves significant time when you only need one or two remaining challenges.
Play on Operative difficulty (normal) for all challenge runs. On this difficulty, guards are less perceptive, their detection cones are narrower, and quicktime event timing windows are larger. You can always replay the mission on harder difficulties later if you want the combat challenge, but for knocking out the 9 challenges efficiently, Operative is the way to go.
Watch for the tall grass concealment indicator on your HUD. When you are hidden in foliage, a small eye icon appears with a slash through it. If that icon disappears, you are exposed and visible to nearby enemies. This visual cue is extremely helpful during the Ghost challenge run, especially in the central camp where guard patrol patterns overlap and sight lines intersect from multiple angles.
For the Pacifist challenge specifically, remember that the distinction between lethal and non-lethal takedowns is determined by how long you hold the takedown button. A quick tap performs a non-lethal choke hold, while holding the button down results in a lethal neck snap. The game does not always make this distinction obvious during the tutorial, so practice the timing on the first few guards until it becomes second nature.
Collectible Locations in Against the Odds
There are 4 collectibles in the Against the Odds mission, spread across different areas of the camp. Finding all of them in a single run completes the Completionist challenge. Each collectible belongs to a category: Legacy items, Mementos, and Postcards. Here is where to find each one, listed in the order you will naturally encounter them during the walkthrough.
- 7 of Acorns (Legacy Item): Located in Room A2 on a shelf behind supply boxes in the back corner. Grab this during Part 2 when you search for intel. The shelf is partially obscured, so rotate your camera to spot the faint glow behind the boxes.
- Iceland Postcard (Postcard): Found in Tent A4 on a folding table between two cots. Pick this up on your way to container G9 in Part 4. The tent is unguarded, so it is a quick and easy grab.
- Cruciform Key (Legacy Item): Inside container B4 on a small metal table near the hostages. You can only access this after opening the container in Part 5. Wait for the hostage dialogue to finish and look carefully near where they are sitting.
- Satellite Part (Memento): Wedged between two stacked shipping containers near container B4. This is the hardest collectible to spot in the mission. Crouch down at ground level and look into the gap between the containers. The faint glow becomes visible when you are very close.
Collectibles emit a faint golden shimmer when you are within a few meters, so if you are having trouble finding one, walk slowly through the general area and watch for the glow. The game also tracks which collectibles you have found in the pause menu under the Collectibles tab, so check there if you think you missed something during your current run.
If you are going for the Completionist challenge, I recommend collecting them in this order: 7 of Acorns first since it is in the earliest accessible area, then the Iceland Postcard on your way to G9, then both the Cruciform Key and Satellite Part at the same time when you reach B4. This path minimizes backtracking and keeps your run as efficient as possible. The entire collection route adds only about 2-3 minutes to a normal playthrough if you know exactly where to look.
One thing to keep in mind: if you die or reload a checkpoint after picking up a collectible, the game saves your collection progress. You do not need to re-pick collectibles you already grabbed in a previous checkpoint. This is helpful to know because it means you can focus on collectibles during a casual run without worrying about losing progress if you mess up a stealth section later.
FAQ
How long does the Against the Odds mission take?
The Against the Odds mission takes about 35 to 45 minutes on a first playthrough. Speedruns can bring it down to 15 to 20 minutes once you know the layout and guard patterns. Challenge completion runs typically take 45 to 50 minutes for the stealth run and 25 to 30 minutes for the action run.
Is 007 First Light basically Hitman?
007 First Light shares DNA with Hitman since both are made by IO Interactive, but they play differently. The stealth mechanics feel similar with disguises and environmental kills, but 007 First Light adds more action sequences, chase scenes, and quicktime events that feel closer to Uncharted. Think of it as a blend of Hitman stealth and Uncharted cinematic action.
Can you complete all 9 challenges in a single run?
No, you cannot complete all 9 challenges in a single run because some are mutually exclusive. The Pacifist challenge requires zero kills while the Assault challenge requires eliminating every enemy. These directly conflict. You need at least two runs using the multi-run strategy outlined in this guide.
Is 007 First Light replayable?
Yes, 007 First Light is highly replayable. Each mission has 9 challenge objectives that require different play styles, collectibles scattered throughout the maps, and a chapter select system that lets you replay specific sections. The Against the Odds mission alone supports 2 to 3 full playthroughs for completionists, and the entire campaign offers dozens of hours of content for players chasing 100 percent completion.
What difficulty should I play Against the Odds on?
Play on Operative difficulty (normal) for your first run. This lets you learn the camp layout and guard patterns without excessive pressure. Save the harder difficulties for challenge runs once you know the mission inside and out. The quicktime event timing windows are also more forgiving on Operative, which matters for challenges like 00 To Become.
Wrapping Up Against the Odds
The Against the Odds mission is a strong opening for 007 First Light. It teaches you the core mechanics in a natural way, gives you room to experiment with both stealth and action approaches, and sets up the story in a way that makes you want to keep playing through the rest of the campaign. Whether you cleared it in 30 minutes or spent an hour hunting every last collectible, you now have the skills and knowledge that carry into every mission that follows.
If you are planning to go for all 9 challenges, remember the two-run strategy from this guide: one stealth run for Pacifist, Ghost, Scenic Route, High Ground, and Completionist, then one action run for Assault, No Help Needed, Full Of Surprises, and 00 To Become. Chapter select makes it easy to replay specific sections without starting over from scratch.
The 4 collectibles scattered through the Iceland camp are worth grabbing on your first run if possible, especially the 7 of Acorns and Iceland Postcard which are easy to pick up along the main path. The Cruciform Key and Satellite Part require a bit more effort near container B4, but they are not difficult once you know where to look.
For more on the full game, check out our guide on how long it takes to beat 007 First Light to plan your complete playthrough. The campaign has several more missions after Against the Odds, each with their own set of challenges, collectibles, and memorable set pieces to discover.
This 007 First Light Against The Odds Mission Walkthrough covers everything you need to complete the prologue with full marks. Good luck out there, Bond.