
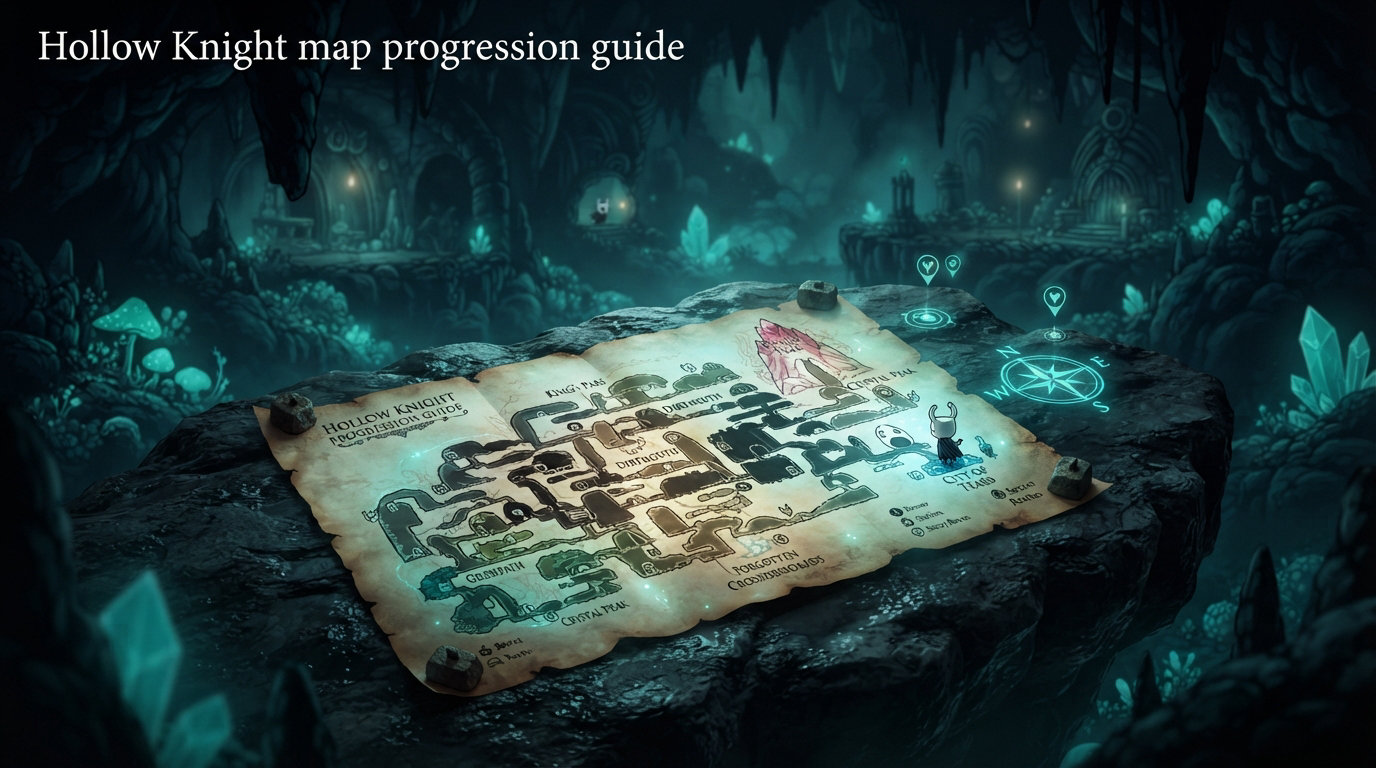
Exploring Hallownest without a clear direction can feel overwhelming. The world of Hollow Knight is beautiful but unforgiving, and we have watched countless players wander in circles, unsure where to go next. This Hollow Knight map progression guide exists because the game does not hold your hand. It drops you into a vast interconnected world and expects you to figure out where to go. That freedom is part of what makes the game special, but it also creates frustration for players who just want to know the correct path forward.
In this guide, our team breaks down every major area, the abilities you need to access them, and the boss encounters that unlock further progression. We spent over 200 hours exploring every corner of Hallownest to bring you the most comprehensive progression guide available. Whether you are aiming for your first completion or chasing the coveted 112% mark, this guide has everything you need to navigate the kingdom without getting hopelessly lost.
Table of Contents
Getting Started: The First Steps in Hallownest
Your journey begins in King’s Pass, a short tutorial area that teaches you the basics of movement and combat. The game introduces you to the nail (your sword), soul collection, and the concept of bench checkpoints. This area takes most players about 10-15 minutes to complete. There is nothing here that gates your progression, so take your time getting comfortable with the controls before moving on.
Upon completing King’s Pass, you emerge in Dirtmouth, the central hub village that connects to multiple areas. This small settlement is home to several important NPCs. Iselda, Cornifer’s wife, sells you the quill and ink when you have the money. These items are essential for map-making as you explore. We cannot stress enough how important it is to buy these early. Without the quill, you will fill your map with guesswork instead of accurate notes.
The Stag Station in Dirtmouth connects to several areas, but you should resist the urge to explore everywhere immediately. The stag stations are convenient, but using them before you are ready can leave you in areas you cannot escape. For now, stay focused on the main path through the Forgotten Crossroads.
The Forgotten Crossroads
The Forgotten Crossroads is your first major area and serves as the gateway to much of early-game content. The moment you descend from Dirtmouth, you will hear the distant clanging of machinery and see smoke rising from below. This industrial area is full of threats, but it also contains your first real boss encounter and several essential upgrades.
Before tackling any bosses, explore the outer edges of the Crossroads to find the three Mask Shards hidden throughout. These small blue fragments add to your maximum health, giving you more hits before dying. Finding all three early can be the difference between frustration and progress. The first is near the entrance on a lower ledge, the second requires a simple jumping puzzle, and the third is guarded by a stationary enemy.
Cornifer can be found in the center of the Crossroads, usually near a bench. Buy his map immediately when you see him. His maps are essential for not getting lost, and he moves on once you leave the area. If you miss him, you will have to wait until you unlock the “Get a Map” charm from Sly in Greenpath, which costs 100 geo.
Gruz Mother Boss
The first real boss of Hollow Knight waits in a large chamber in the lower Crossroads. Gruz Mother is a large creature that drops from above and attacks by charging and creating shockwaves. This fight teaches you the fundamentals of boss combat: watch for telegraphs, dodge at the right moment, and strike when there is an opening.
Gruz Mother has roughly 200 health and can be defeated in about two minutes once you understand the pattern. She telegraphs her charge attack by glowing red, giving you time to jump over or move away. After each attack sequence, she rests briefly, providing a safe window to deal damage. Do not get greedy with your hits. Two or three strikes per opening is the safe approach.
First Abilities and Where to Find Them
Abilities in Hollow Knight are not just upgrades. They are keys that unlock entire regions of the map. Without certain abilities, you simply cannot access areas that lie beyond obstacles. This section covers the essential early-game abilities that open up the majority of Hallownest for exploration.
Vengeful Spirit – Your First Spell
Your first major ability comes from the Ancestral Mound, located in the upper right section of the Forgotten Crossroads. The Vengeful Spirit is a ranged spell that shoots a burst of soul energy at enemies. While it is not your most powerful attack, it is invaluable for dealing with flying enemies and hitting foes in awkward positions.
To find the Ancestral Mound, look for a passage near the top of the Crossroads that leads upward. The entrance is easy to miss if you are not paying attention to the environment. Once inside, navigate through the corpse-filled tunnels until you reach a large open chamber. The spell is sitting on a corpse hanging from the ceiling. Touch it to receive the Vengeful Spirit.
The Vengeful Spirit costs 12 soul per use, so you need to be collection souls regularly to use it effectively. We recommend pairing it with the Soul Catcher charm, which increases soul collection from enemies. This combination makes the early game significantly easier and sets you up for more advanced spells later.
False Knight Boss
False Knight is the second major boss in the Forgotten Crossroads and represents a significant step up in difficulty from Gruz Mother. This armored foe uses ground pounds, overhead strikes, and a shield charge. The key to this fight is waiting for the right moments to strike.
The False Knight has approximately 400 health and three distinct phases. In the first phase, he has limited mobility and telegraphs his attacks clearly. His second phase adds a jumping attack and more aggressive behavior. The third phase removes his armor, making him faster but also more vulnerable to damage.
We recommend waiting until you have at least five masks (health points) before attempting this fight. If you die, you will lose geo based on how much you were carrying, so deposit excess geo at a bench before engaging. The rewards for defeating False Knight include a Vessel Fragment and access to the Greenpath area.
Mothwing Cloak – The Dash Ability
The Mothwing Cloak is the dash ability that becomes essential for almost all subsequent gameplay. This ability allows you to dash through the air in any direction, giving you invincibility frames during the dash. You can find it after defeating Hornet in Greenpath.
Greenpath is the lush, overgrown area that lies beyond the Forgotten Crossroads. The path to Greenpath opens after you defeat False Knight and examine the Stag Station alarm. This beautiful area is a stark contrast to the industrial Crossroads and introduces you to Hornet, the spike-wielding guardian who serves as the area boss.
Hornet is a challenging fight that tests your ability to read attack patterns and time dodges. She attacks with sweeping needle strikes, circular spin attacks, and ground-based ranged attacks. The Mothwing Cloak is your reward for defeating her, and it transforms how you approach every subsequent area and boss fight in the game.
Hollow Knight Map Progression Guide: The Main Path
The main progression path through Hollow Knight follows a roughly linear route with several branches. While the game does allow for some freedom in which order you tackle areas, there is a clear intended progression that most players follow. This section details the primary areas, their bosses, and the prerequisites for accessing each region of Hallownest.
The Recommended Area Order
Most players follow this progression sequence through the main story areas. This order is not strictly enforced by the game, but it matches the intended difficulty curve and ability gates.
First, you start in King’s Pass and move to Dirtmouth. From there, explore the Forgotten Crossroads and defeat Gruz Mother and False Knight. With the False Knight’s reward, access Greenpath and defeat Hornet to obtain the Mothwing Cloak. Next, travel through the Fungal Wastes to reach the City of Tears. After the City, branch into the Royal Waterways, Crystal Peak, and Resting Grounds in whatever order feels comfortable. Finally, access the late-game areas including Deepnest, Kingdom’s Edge, and Ancient Basin before reaching the endgame.
Greenpath and the Path to the City
Greenpath is a massive underground jungle filled with poison, patrolling enemies, and hidden passages. This area is significantly larger than the Crossroads and requires the Mothwing Cloak to navigate effectively. Many new players get lost here, so keeping your map updated is crucial.
The key locations in Greenpath include the Mossy Prophet NPC who teaches you about the Dream Nail, several Mask Shards hidden in poison pits, and the Vengefly King boss if you have not already defeated him in the Crossroads. The main exit leads to the Fungal Wastes, which contains the shortcut to the City of Tears.
Fungal Wastes and Mantis Village
The Fungal Wastes are home to the Mantis Tribe, fierce warriors who initially fight you on sight. You cannot access the City of Tears without either fighting through Mantis Village or taking an alternate route. We recommend fighting through the village because it contains excellent rewards and prepares you for the challenges ahead.
Mantis Lords is a four-phase boss fight that begins with two lords and escalates to all three. Each sister has distinct attack patterns, and the arena evolves as you defeat each one. The fight is challenging but fair, and successfully beating all three grants you the Mantis Claw ability, which allows you to wall jump. This ability is essential for reaching many areas of the map.
City of Tears and Soul Master
The City of Tears is the largest single area in Hollow Knight and serves as the central hub for mid-game content. The perpetual rain creates a somber atmosphere as you navigate through the crumbling architecture and hidden passages. This area contains the Soul Sanctum, several important charms, and the Soul Master boss.
Soul Master is a two-phase boss who fights from the center of his chamber. He attacks with sweeping soul beams, summoned minions, and diving strikes. The key to this fight is staying mobile and not getting cornered. His second phase adds homing soul orbs that require precise dodges to avoid. Defeating Soul Master grants you the Desolate Dive spell and access to the Crystal Peak.
Crystal Peak and the Crystal Heart
Crystal Peak is an underground mining area filled with crystal formations and explosive enemies. The Crystal Heart ability, found in the deepest section of the area, allows you to charge and dash through the air for extended distances. This ability is essential for reaching several late-game areas and collecting hidden items.
The descent to Crystal Heart is treacherous, with many opportunities to fall to your doom. We recommend exploring systematically rather than rushing toward the ability. The area contains several Mask Shards and charm notches that are worth collecting along the way. At the bottom of the peak, you will face the Crystal Guardian boss before accessing the Crystal Heart chamber.
Resting Grounds and the Dream Nail
The Resting Grounds is a peaceful area filled with graves and memorials to the citizens of Hallownest. The main attraction here is the Dream Nail, an ability that allows you to enter the dreams of certain NPCs and enemies. This ability is required for accessing hidden content and unlocking the true ending of the game.
To get the Dream Nail, you must first help the Seer in the Resting Grounds by giving her 2400 essence. Essence is collected by using the Dream Nail on enemies and NPCs who glow when you approach them. Once you have enough essence, return to the Seer and receive your reward. The Dream Nail opens up entire questlines that are otherwise inaccessible.
Mid-Game Areas: Royal Waterways to Ancient Basin
After completing the City of Tears, you have access to multiple branching paths. The mid-game is where many players feel overwhelmed because the game stops explicitly telling you where to go next. This section covers the areas that open up and how to approach them in a logical sequence.
Royal Waterways and Dung Defender
The Royal Waterways is a flooded area filled with sewage, dung defenders, and the ACL test. Accessing this area requires either the Mantis Claw or the Monarch Wings, depending on your route. The area is notorious for its tight corridors and easy-to-miss passages.
Dung Defender is the main boss of the Royal Waterways. He fights from within a ball of dung and attacks with rolling charges and projectile attacks. The fight is more comedic than challenging, but do not let your guard down. His second phase adds more aggressive behavior and better tracking on his attacks.
At the bottom of the Royal Waterways, you can access Isma’s Grove, which contains the Isma’s Tear ability. This charm grants you poison immunity when standing still, making it essential for navigating the poison-filled areas of Hallownest.
Deepnest – The Most Dreaded Area
Deepnest is where many players first experience genuine frustration with Hollow Knight. This maze-like area is dark, cramped, and filled with enemies that seem to appear from nowhere. The good news is that Deepnest is entirely optional for the main story. The bad news is that several essential items and abilities are hidden here.
We recommend entering Deepnest only after you have the Mantis Claw and Mothwing Cloak. These abilities make the narrow corridors significantly more manageable. The main rewards in Deepnest include the City Crest (which opens the gate to the City of Tears), the Split Worm boss fight, and several Mask Shards scattered throughout the maze.
Do not feel obligated to explore every corner of Deepnest on your first visit. The area is designed to be disorienting, and many players waste hours trying to map it out. Focus on the main path and return later when you have more experience and better abilities.
Ancient Basin and Monarch Wings
Ancient Basin is a dark, underground area that can only be accessed from the City of Tears. The area is notable for its vertical design and the Monarch Wings ability, which grants a double jump. This ability is essential for reaching many late-game areas and collecting the remaining upgrades.
The path to Monarch Wings requires navigating through parts of Deepnest and solving a puzzle involving the City Crest. Once you reach the Archives, you will face the Broken Vessel boss before accessing the ability. The Broken Vessel is a relatively easy fight compared to other bosses, but its location in the dark corner of the map catches many players off guard.
Late-Game Areas and Final Progression
The late game of Hollow Knight ramps up the difficulty significantly while also providing some of the most satisfying abilities and moments in the game. This section covers the areas leading to the final boss encounters and the Path of Pain.
Kingdom’s Edge and Hornet Sentinel
Kingdom’s Edge is a wasteland area that can be accessed from the City of Tears or through a shortcut from Deepnest. The area is home to Hornet Sentinel, the second major boss encounter with Hornet. This fight is significantly harder than your first encounter with her and requires mastery of all the combat skills you have developed.
Hornet Sentinel uses a variety of attacks including needle throws, dash strikes, and ground-based AoE attacks. She also gains access to new attack patterns that require quick reflexes to dodge. The fight takes place in an arena that allows for plenty of movement, so use the space to your advantage.
Defeating Hornet Sentinel rewards you with the Kingbrand, an ability that creates a trail of fire when you dash. This ability is required for accessing certain areas and solving puzzles, but it is not essential for completing the main story.
The Abyss and Shade Cloak
The Abyss is the lowest point in Hallownest and can only be accessed after obtaining the Monarch Wings. This dark, vertically-oriented area is filled with shade enemies and environmental hazards. The main reward here is the Shade Cloak, which upgrades your dash to pass through enemies and obstacles.
Navigating the Abyss requires careful platforming and patience. The shade enemies can be frustrating, but they follow predictable patterns once you learn their attack timings. At the bottom of the Abyss, you will find the Shade Gate and the path to the Void tendrils that lead to the Shade Cloak ability.
Queen’s Gardens
Queen’s Gardens is a massive underground garden filled with mantis enemies and the Traitor’s Child boss. Accessing this area requires either the Mantis Claw or Monarch Wings, depending on your route. The area is beautiful but challenging, with many platforming sections that demand precise movement.
The Traitor’s Child is a multi-phase boss who fights alongside allied mantis enemies. The fight escalates as you defeat each phase, adding more enemies and more complex attack patterns. The key to this fight is controlling the arena and not letting yourself get surrounded.
Fog Canyon and Uumuu
Fog Canyon is an acid-filled area that requires the Isma’s Tear ability to navigate safely. The main attraction here is Uumuu, a boss fight that requires the Son of Hugo charm (found in the Hive) to damage effectively. If you do not have this charm, the fight becomes significantly longer and more frustrating.
The area also contains the Teacher’s Archives, which is home to the Lifeblood Cocoons that grant extra masks. Collecting these is essential for players pursuing high-completion runs.
White Palace and the Path of Pain
The White Palace is a challenging platforming gauntlet that tests everything you have learned about movement and precision. Accessing this area requires the Monarch Wings and the King’s Brand, which you obtain from Hornet Sentinel. There are three sections of the White Palace, each more difficult than the last.
The Path of Pain is the final section of the White Palace and is considered one of the most difficult platforming challenges in the game. We recommend taking breaks between attempts and not trying to complete it in one sitting. The rewards for completing the White Palace include the Void Heart, which is required for accessing the true ending.
Temple of the Black Egg and Final Bosses
The Temple of the Black Egg is the final area of the main story. Accessing this area requires the King Brand and the activated Dream Nail. Inside the temple, you will face The Hollow Knight, the initial final boss of the game.
The Hollow Knight fight is a test of all your skills accumulated throughout the game. The boss has multiple phases, each with distinct attack patterns and increasing difficulty. Phase one focuses on melee attacks, phase two adds nail arts and projections, and phase three is a desperate final stand.
After defeating The Hollow Knight, you face the Radiance, the true final boss. This fight is significantly harder and requires precise dodging and pattern recognition. The Radiance uses a variety of attacks including light beams, expanding rings, and a final phase where the arena fills with platforms.
Essential Ability Acquisition Order
Knowing where to get each ability is only part of the equation. You also need to know the optimal order for acquiring abilities to minimize backtracking and maximize your progression efficiency. This section details the recommended order for obtaining all essential abilities.
Movement Abilities in Order
The first ability you should obtain is the Mothwing Cloak from Hornet in Greenpath. This dash ability opens up the majority of the early and mid-game areas. Without it, you will struggle with even basic navigation.
The second priority is the Mantis Claw from the Mantis Lords in Fungal Wastes. This wall-jump ability is essential for reaching vertical areas and makes Deepnest significantly more manageable. You can obtain this before or after the Mothwing Cloak, but most players get it afterward.
The third essential ability is the Monarch Wings from Ancient Basin. This double jump is required for accessing late-game areas and many hidden sections throughout Hallownest. The path to Ancient Basin requires navigating through Deepnest, which is why we recommend getting the Mantis Claw first.
The Crystal Heart from Crystal Peak should be your fourth priority. This charging dash ability is essential for reaching areas that require extended air time. Many late-game secrets are inaccessible without it.
Finally, the Shade Cloak from The Abyss should be your last major movement ability acquisition. This upgraded dash grants invincibility frames and the ability to pass through enemies, making boss fights significantly more manageable.
Spell Abilities and Upgrades
Your spell progression should follow this order. First, get the Vengeful Spirit from Ancestral Mound for your initial ranged option. Second, get the Desolate Dive from Soul Sanctum after defeating Soul Master. This ground-pound spell is essential for solving puzzles and dealing damage to aerial enemies.
Third, get the Dive spell upgrade (Abyss Shriek) from the Abyss for a powerful downward attack. Fourth, get the Great Slash nail art from the Nailmaster in City of Tears for a powerful melee option. Finally, get the Dash Slash nail art from the Howling Cliffs for an enhanced horizontal attack.
Common Mistakes and How to Avoid Getting Stuck
We have seen countless players make the same mistakes that lead to frustration and stagnation. This section addresses the most common issues and provides solutions to keep your progression smooth and enjoyable.
Not Buying Maps Before Exploring
The single biggest mistake new players make is ignoring the mapping system. Hollow Knight’s world is complex, and trying to navigate without a detailed map is a recipe for getting lost. Always buy the quill and ink from Iselda in Dirtmouth as soon as you have 180 geo. Always buy maps from Cornifer when you find him in each new area.
If you miss Cornifer, do not panic. You can purchase the “Get a Map” charm from Sly in Greenpath for 100 geo. This charm automatically reveals the map when you rest at a bench, though it does not show as much detail as buying Cornifer’s maps.
Missing Cornifer in Each Area
Cornifer leaves an area as soon as you leave it, and he does not return. If you miss him in an area, you will have to rely on the Get a Map charm or explore blind. To avoid missing him, always check the area thoroughly before moving on to the next zone.
Cornifer can be identified by the humming sound he makes. If you hear humming while exploring a new area, follow the sound to find him. He is usually near a bench or in a central location within the zone.
Skipping Essential Abilities
Some players try to rush through the main story without obtaining all the abilities. This approach leads to getting stuck in areas you cannot escape from. Always prioritize obtaining the essential movement abilities (Mothwing Cloak, Mantis Claw, Monarch Wings) before exploring off the main path.
The game does not force you to get these abilities in any order, but certain areas are impossible to navigate without them. If you find yourself unable to progress, check your ability menu and see if there is an ability you have not yet acquired that might help.
Ignoring Bench Placement
Bench checkpoints are sparse in some areas, and dying far from a bench means losing significant geo and time. Always check your map for bench locations before exploring deep into a new area. If you are about to attempt a challenging section, consider whether a bench is nearby.
You can teleport between benches once you have the Tram Lore from the Fungal Wastes. This makes bench placement less critical but does not eliminate the need to plan your routes carefully.
Required vs Optional Areas Confusion
Many players struggle to distinguish between required and optional content. The main story requires only a fraction of the total areas in the game. If you are focused on completing the story, focus on the areas that advance the narrative and ignore optional content until you have beaten the final boss.
Required areas include King’s Pass, Forgotten Crossroads, Greenpath, Fungal Wastes, City of Tears, Resting Grounds, and the late-game areas leading to the Temple of the Black Egg. Optional areas include Deepnest (though it contains required items), Queen’s Gardens, Fog Canyon, and the White Palace.
Optional Areas and Missable Content
Hollow Knight contains numerous optional areas that offer additional challenges, lore, and rewards. While these are not required for the main story, they contain content that many players consider essential to the full experience.
Howling Cliffs – Optional Starting Area
The Howling Cliffs are technically accessible from the beginning of the game but are often missed by new players. This area contains Nailmaster Mato, who teaches you the Dash Slash nail art. The area also provides additional lore about the Kingdom’s edge and the Nailmasters.
Godhome DLC Content
The Godhome DLC adds the Hall of Gods, Pantheon challenges, and the ability to fight all bosses in sequence. This content is entirely optional but offers hundreds of hours of additional gameplay for players who want to master the combat system. The DLC is free and included with the base game.
Grimm Troupe DLC
The Grimm Troupe DLC adds a new questline involving the mysterious Grimm and his troupe of performers. This content includes new charms, abilities, and boss fights. Completing the questline grants the Grimmchild charm, which evolves as you complete challenges throughout the game.
Missable NPCs and Questlines
Several NPCs in Hollow Knight can only be encountered at specific times or in specific locations. If you miss them, their questlines become unavailable. The most notable missable NPCs include the Mr. Mushroom NPC (who requires finding seven mushroom locations), the Blue Child (which requires specific actions in the Waterways), and several NPC questlines that are triggered by talking to characters in specific areas.
100% vs 112% Completion
True completion of Hollow Knight requires achieving 112% game completion, not 100%. The additional 12% comes from specific achievements that are not tracked in the normal completion percentage. These include defeating all dream bosses in the Hall of Gods, obtaining all bindings, and completing the Embrace the Void challenge.
The 2400 essence mentioned in PAA questions refers to the amount needed to purchase the Dream Nail from the Seer. This is a different metric from completion percentage and is required for accessing certain endings and content.
Frequently Asked Questions
In what order should you visit areas in Hollow Knight?
The recommended order is: King’s Pass and Dirtmouth first, then Forgotten Crossroads, followed by Greenpath after defeating False Knight. Next comes Fungal Wastes and City of Tears, then branch into Royal Waterways, Crystal Peak, and Resting Grounds. Late-game areas including Deepnest, Kingdom’s Edge, and Ancient Basin come before the final Temple of the Black Egg.
What is the correct path in Hollow Knight?
There is no single correct path, but most players follow this sequence: start in King’s Pass, reach Dirtmouth, explore the Forgotten Crossroads while defeating Gruz Mother and False Knight, then access Greenpath by defeating Hornet. From Greenpath, progress through Fungal Wastes to reach the City of Tears, which serves as the central hub for mid-game content.
Do you need 2400 essence for 112%?
You need 2400 essence to purchase the Dream Nail from the Seer in the Resting Grounds. While this is not directly tied to the 112% completion counter, the Dream Nail is required for accessing hidden content, dream boss fights, and the true ending of the game.
How do I progress when stuck in Forgotten Crossroads?
If you are stuck in Forgotten Crossroads, focus on finding three things: the Mask Shards to increase your health, Cornifer to buy the map, and the exit to Greenpath (which requires defeating False Knight). If enemies are too difficult, explore the edges of the area to build soul and find upgrades before engaging bosses.
Which abilities are required for main story completion?
The essential abilities for main story completion are the Mothwing Cloak (dash), Mantis Claw (wall jump), and Monarch Wings (double jump). Spells like Vengeful Spirit and Desolate Dive are helpful but not strictly required. The Dream Nail is required for the true ending.
Where do I get the dash ability in Hollow Knight?
The dash ability (Mothwing Cloak) is obtained by defeating Hornet in Greenpath. Hornet is the boss guarding the exit from Greenpath to Fungal Wastes. After the fight, she rewards you with the Mothwing Cloak, which allows you to dash in any direction and grants brief invincibility frames.
Wrapping Up Your Journey Through Hallownest
This Hollow Knight map progression guide has walked you through every major area, essential ability, and boss encounter in the game. The journey through Hallownest is meant to be challenging, and getting lost is part of the experience. Do not be discouraged if you die repeatedly or spend hours exploring the same areas. Every player who has completed this game has been exactly where you are now.
The key takeaways from this guide are simple. First, always buy maps and keep them updated. Second, prioritize essential movement abilities before exploring off the main path. Third, do not be afraid to backtrack when you get stuck. And fourth, remember that the beauty of Hollow Knight lies in its open-ended design. You are not forced to follow this progression guide exactly. Let the game surprise you.
Whether you are aiming for your first completion or chasing the legendary 112% achievement, we hope this Hollow Knight map progression guide has helped make your journey through Hallownest a little bit easier. The kingdom awaits, and there is still so much left to discover.