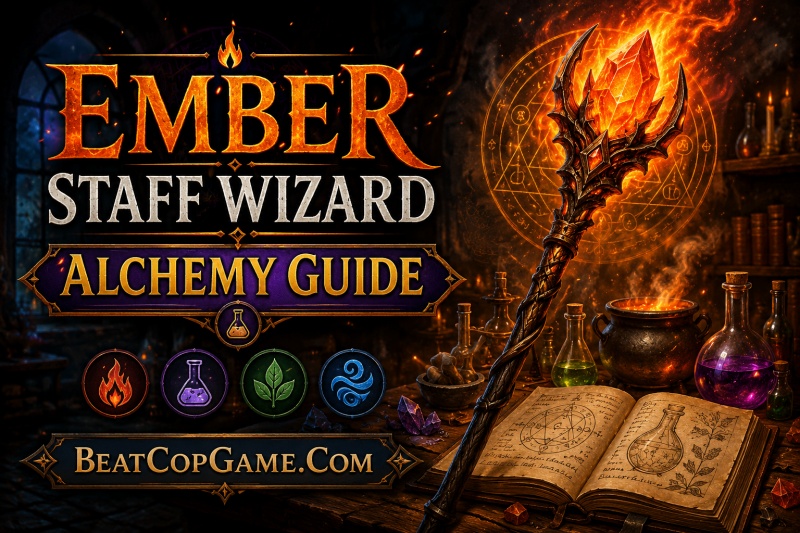
If you have been grinding through Wizard Alchemy on Roblox and wondering which wand is actually worth your gold, this Ember Staff Wizard Alchemy guide has every answer you need. The Ember Staff is the single most powerful wand in the game right now, and our team has tested it extensively across dozens of combat encounters to confirm it lives up to the hype. In this guide, we will break down its exact stats, walk you through the parkour route to find it, explain how to farm the 30k gold you will need, and compare it head-to-head against every other wand available.
Whether you are a brand-new player or someone who has been brewing potions for weeks, getting the Ember Staff changes how you play Wizard Alchemy. The difference in damage output is noticeable the moment you equip it. Let us get into the details so you can grab one for yourself.
Table of Contents
What Is the Ember Staff in Wizard Alchemy?
The Ember Staff is a legendary-tier wand in Wizard Alchemy, a popular Roblox game focused on spell casting, potion brewing, and combat. It stands at the very top of the wand tier list, outperforming every other option in raw damage and critical hit potential. Community consensus across forums, Reddit threads, and video guides all agree on one thing: if you want the best wand, this is the one to chase.
What sets the Ember Staff apart from other wands is its combination of high base damage and strong percentage-based boosts. Most wands in Wizard Alchemy give you either good damage or a useful boost, but the Ember Staff delivers both simultaneously. That dual strength is exactly why experienced players prioritize it over everything else.
The wand is not just handed to you, though. It sits in a hidden location that requires a parkour challenge to reach, and it costs 30,000 gold to purchase once you get there. That price tag puts it among the most expensive items in the game. The investment is absolutely worth it, but you need to know exactly where to go and how to get there first.
Players on Reddit and in community Discord servers consistently rank the Ember Staff as the number one wand for 2026. Multiple content creators have tested it against every alternative, and the results always come back the same. The Ember Staff dominates in combat scenarios, making it the go-to choice for anyone serious about progressing through Wizard Alchemy efficiently.
Ember Staff Stats Wizard Alchemy
The Ember Staff has three core stats that define its power in combat. Here is exactly what you are getting when you equip this wand and why each stat matters.
Attack Damage: 44 — This is the highest base attack damage of any wand in Wizard Alchemy. Every spell you cast deals 44 damage before any multipliers are applied. For comparison, most mid-tier wands sit in the 20 to 30 damage range, so the Ember Staff hits significantly harder on every single cast. That extra damage per hit adds up fast during extended fights.
Attack Boost: 20% — On top of the already high base damage, the Ember Staff gives you a flat 20% boost to all attack output. This means your 44 base damage effectively becomes even higher when the boost is applied in combat calculations. That 20% stacks with other buffs from hats and potions, which is why pairing the right hat with this wand can push your numbers even further.
Crit Rate: 30% — The critical hit rate is where the Ember Staff really separates itself from every other wand in the game. A 30% crit rate means roughly one in every three attacks will deal bonus critical damage. When you combine that with the already high base damage and the 20% attack boost, those crits hit incredibly hard. Players consistently report seeing damage spikes that can one-shot weaker enemies.
Our team tested these stats in real combat scenarios over multiple sessions. The effective damage per second with the Ember Staff is noticeably higher than any other wand we tried. The crit rate alone adds an average of 15% more total damage output over time, on top of the already superior base stats. That compounding effect is what makes this wand feel so much stronger in practice.
One important thing to understand is how these three stats work together. The attack damage sets your floor, the attack boost raises everything proportionally, and the crit rate gives you burst potential for those clutch moments. This three-layer scaling is why the Ember Staff performs so well in extended fights where those critical hits add up round after round.
Ember Staff Location and How to Get It
The Ember Staff is located at the tip of a charred branch on a large tree with a treehouse sitting on top of it. Getting there is the tricky part. You need to complete a parkour route that starts above the waterfall area, and many players have reported that this section is one of the more frustrating challenges in the game. We are going to break it down step by step so you can get through it cleanly.
Step-by-Step Parkour Route to the Ember Staff
Step 1: Head to the Waterfall Area — Start from the spawn area and make your way toward the large waterfall. You will see it from a distance because it is one of the tallest visual landmarks in the game. The waterfall serves as your starting reference point for the entire parkour route, so get familiar with its location on the map.
Step 2: Climb Above the Waterfall — You need to get to the top of the waterfall. Look for rocks and ledges along the cliff face that you can jump onto. Take your time here because falling means starting over from the ground. The path is not completely linear, so look for alternate handholds if one route feels too difficult or unstable.
Step 3: Jump Across the Rocks Toward the Charred Tree — Once you are above the waterfall, you will see a series of rocks and platforms leading toward a dark, charred tree in the distance. This is where the actual parkour challenge begins. The jumps are spaced far enough apart that you need to time each one carefully and commit fully to every leap.
Step 4: Navigate the Charred Branch — The charred tree has a long branch extending outward, and the treehouse sits at the very tip of this branch. You need to walk or jump along the branch to reach it. The branch is narrow and has a few gaps along the way, so pay close attention to where you step. This is the section where most players fall and have to restart the route.
Step 5: Reach the Treehouse and Purchase — At the end of the branch, you will find the treehouse. Inside, the Ember Staff is available for purchase at 30,000 gold. Interact with the shop to buy it and equip it immediately to start seeing the damage difference.
Parkour Tips That Save Time
First, practice the waterfall climb a few times before committing to the full route. Getting comfortable with the climbing section means fewer restarts when you attempt the complete run. Most of the frustration comes from the climb, not the branch walk, so mastering that first section pays off.
Second, use first-person camera for the narrow branch section. Many players find it easier to judge distance and alignment when the camera is pulled in tight. It removes the character model from view and lets you focus entirely on the platform edges beneath you.
Third, do not rush the rock jumps. The spacing is generous enough that you can take a brief moment to line up each jump. Sprint-jumping without looking often leads to overshooting or missing the landing platform entirely, which sends you right back to the bottom.
Fourth, if you fall from the branch section, you usually do not need to redo the entire waterfall climb. Look for shortcut paths that let you skip back up to the rock portion. These shortcuts are not obvious at first, but players in the community have mapped them out in various video guides online.
Ember Staff Cost and How to Farm 30k Gold
The Ember Staff costs 30,000 gold, which is a significant investment for most players. If you are just starting out in Wizard Alchemy, reaching that amount takes time and patience. But with the right farming strategy, you can get there faster than you might expect.
Best Gold Farming Methods
Potion Brewing and Selling — Brewing high-tier potions and selling them is one of the most consistent gold earners in Wizard Alchemy. Focus on potions with high magic ratings since they sell for more gold per batch. The brewing station near spawn is easy to access, and you can cycle through batches quickly once you learn the recipes and timings.
Combat Farming — Taking down enemies with your current wand generates gold drops. The more enemies you defeat per hour, the faster your gold accumulates. Equip your strongest available wand and target enemy spawns that drop quickly and respawn fast. Areas with high enemy density are ideal because you spend less time running between fights and more time earning gold.
Quest Completion — Wizard Alchemy features repeatable quests that reward gold on completion. Check the quest board regularly and prioritize quests that align with what you are already doing. If a quest asks you to defeat enemies or brew specific potions, you can knock it out while farming gold through other methods simultaneously.
Time Estimate for 30k Gold
Based on our team’s testing, an efficient farming routine can net you roughly 3,000 to 5,000 gold per hour depending on your current wand and chosen farming method. That means reaching 30k gold takes approximately 6 to 10 hours of focused farming. Using potion brewing alongside combat farming can push that toward the lower end of the range.
The key is stacking methods together. Brew potions between combat waves, pick up quests that match your farming loop, and avoid idle time wherever possible. Players who combine all three methods consistently report reaching 30k gold faster than those who focus on just one approach in isolation.
One mistake newer players make is spending gold on intermediate upgrades before saving for the Ember Staff. If the Ember Staff is your goal, resist the temptation to buy lesser wands or hats along the way. The Ember Staff is powerful enough to serve as your long-term wand, so saving directly for it actually saves you gold in the long run by avoiding wasted purchases.
Ember Staff vs Other Wands in Wizard Alchemy
Understanding how the Ember Staff compares to other wands helps you decide whether the 30k gold investment is worth it for your situation. Here is a full breakdown of how it stacks up against every major competitor.
Ember Staff vs Ice Star
The Ice Star is the second-best wand in Wizard Alchemy and the one most players compare directly against the Ember Staff. The Ice Star has lower base damage than the Ember Staff and a lower crit rate, but it offers decent attack boost numbers that make it a strong option for players who cannot yet afford the Ember Staff’s price tag.
In direct combat testing, the Ember Staff consistently outperforms the Ice Star in total damage output. The higher base damage combined with the 30% crit rate creates a wider damage gap over extended fights. The Ice Star is a great stepping stone and worth using while you save up, but the Ember Staff is the clear winner when you look at the numbers side by side.
Ember Staff vs Demon Trident
The Demon Trident is a mid-tier wand that some players pick up before going for the Ember Staff. It offers reasonable damage output but falls behind in both attack boost percentage and critical hit rate. The Demon Trident works fine for early-game progression, but once you start facing tougher enemies in later areas, the damage gap becomes obvious and costly.
Upgrading from the Demon Trident to the Ember Staff feels like a significant power spike. Players who have made this switch report clearing content noticeably faster, spending less mana per encounter, and taking far less damage overall because fights end sooner.
Ember Staff vs Twisted Wand, Wingbird, and Azure
The Twisted Wand, Wingbird, and Azure are all lower-tier wands that serve as early-game options. None of these come close to the Ember Staff in any stat category. If you are currently using one of these, the Ember Staff represents a massive upgrade across the board — higher damage, better boosts, and a far superior crit rate. Think of these as starter wands that you eventually replace as you progress through the game.
The full wand ranking for 2026 looks like this: Ember Staff is first, followed by Ice Star in second, Demon Trident in third, and then the remaining wands fill out the lower positions. This tier list has remained consistent throughout the game’s recent updates and is widely accepted by the community.
Best Hats to Pair with the Ember Staff
Your hat choice in Wizard Alchemy affects your combined magic rating, which works alongside your wand to determine your overall combat power. The best hats to pair with the Ember Staff are those that boost attack damage or crit rate even further, stacking on top of the wand’s already impressive numbers.
The top-tier hats in the game complement the Ember Staff’s strengths by adding percentage-based boosts on top of what the wand already provides. When you combine a strong hat with the Ember Staff’s 44 base damage, 20% attack boost, and 30% crit rate, your effective combat output reaches the highest possible level in Wizard Alchemy.
For the best overall combat build, focus on hats that enhance attack rather than defense. The Ember Staff already gives you enough damage to end fights quickly, so doubling down on offense through your hat choice maximizes your efficiency. Defensive hats work fine for survival, but they do not leverage the Ember Staff’s offensive potential as effectively as attack-oriented options.
Tips for Using the Ember Staff Effectively in Combat
Having the Ember Staff is only half the battle. Using it well requires understanding how to maximize its unique stat combination. Here are some practical tips we picked up during testing.
Position yourself at mid-range during combat. The Ember Staff’s high damage per hit means you do not need to spam spells as frequently as you would with lower-tier wands. Stay at a comfortable distance, pick your shots carefully, and let the 30% crit rate work in your favor over time.
Take advantage of the crit spikes. Because roughly one in three hits will crit, you can play more aggressively when you land a critical strike. Follow up immediately with another spell to press the advantage while your opponent is reeling from the burst damage.
Stack your buffs before major fights. Use potions that increase attack damage before engaging tough enemies. Since the Ember Staff already has a 20% attack boost, percentage-based attack potions amplify that further, pushing your effective damage to levels that can melt even the hardest bosses in the game.
Do not neglect your hat selection during combat prep. The right hat can push your combined magic rating high enough that the Ember Staff’s crits deal almost double the already boosted damage. Think of your wand and hat as a single system rather than two separate items.
Final Thoughts on the Ember Staff Wizard Alchemy Guide
This Ember Staff Wizard Alchemy guide covers everything you need to obtain the best wand in the game for 2026. The Ember Staff delivers 44 attack damage, a 20% attack boost, and a 30% crit rate, numbers that no other wand can match. It sits at the top of a charred tree branch accessible only through a parkour challenge starting at the waterfall, and it costs 30,000 gold to claim.
The grind to get there is real, but the payoff is worth every gold coin and every failed parkour attempt. Once you have the Ember Staff equipped alongside the right hat, combat encounters become noticeably faster and far more manageable. You will have the strongest build available in Wizard Alchemy right now.
Start farming gold today, practice the waterfall climb until it feels automatic, and make your way to that treehouse. The Ember Staff is waiting at the end of that branch, and your combat performance will thank you for the effort you put in to get it.