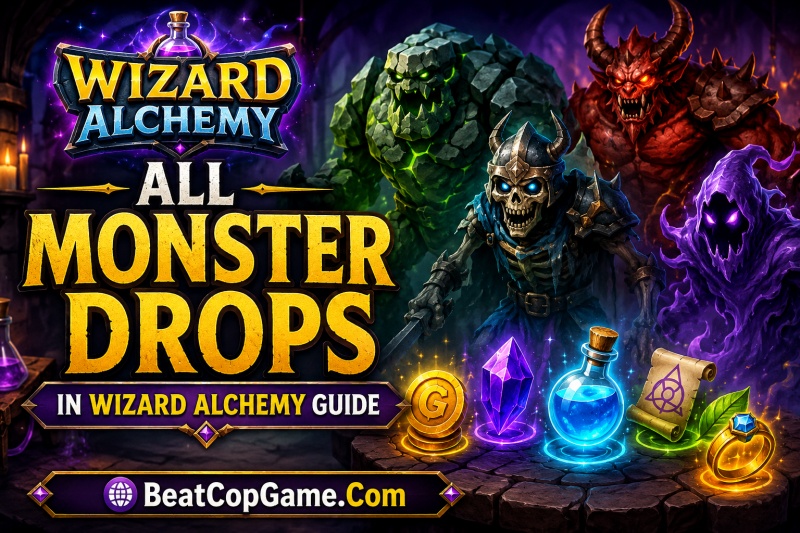
If you are diving into Wizard Alchemy on Roblox and want to know exactly what every monster drops and where to find them, you are in the right place. Our team spent hours farming every creature on Departure Isle to put together this complete Wizard Alchemy monster drops guide with exact percentages, combat tips, and farming recommendations for 2026.
Understanding monster drops is the fastest way to progress in Wizard Alchemy. Every material you collect feeds directly into potion brewing, alchemy recipes, and Gold income. Without knowing which monsters drop what, you end up wasting time on the wrong enemies. This guide covers all 7 monsters, their exact drop rates, locations, difficulty levels, and the best strategies for farming each one.
We organized everything by location so you can plan efficient farming routes, plus we included a farming-by-goal section that tells you exactly which monster to hunt based on what you need.
Table of Contents
All Monster Drops in Wizard Alchemy – Complete Overview
Wizard Alchemy currently features 7 unique monsters spread across Departure Isle, each with its own drop pool. Every single monster in the game drops Gold at a 100% rate, which makes even basic farming profitable. The real difference between monsters lies in their special material drops and how hard they are to defeat.
Here is the complete breakdown of every monster in the game. This table is your quick reference for all Wizard Alchemy monster drops, locations, and difficulty ratings.
| Monster | Location | Notable Drops | Difficulty |
|---|---|---|---|
| Pickaxe Dwarf | Forest | Gold (100%), Flame Crest, Copper Earring | Easy |
| Knife Goblin | Forest | Gold (100%), Goblin Finger, Goblin Bone | Easy |
| Warhammer Dwarf | Beach | Gold (100%), Flame Crest, Copper Earring | Medium |
| Archer Goblin | Beach / Forest | Gold (100%), Goblin Finger, Goblin Bone | Medium |
| Mutant Warhammer Dwarf | Mountain | Gold (100%), Furnace Core (14%), Dark Shard, Light Shard | Hard |
| Mutant Goblin Archer | Above Dwarf King Cave | Gold (100%), Furnace Core (14%), Dark Shard, Light Shard | Hard |
| Dwarf King (Boss) | Dwarf King Cave | Gold (100%), Dwarf Emblem, Golden Tooth, Furnace Core | Elite |
Notice how the difficulty ramps up as you move away from the starting forest area. The forest monsters are perfect for beginners, while the mountain mutants and the Dwarf King are meant for players who have leveled up their Magic Power and stocked up on healing potions.
Each monster has a drop pool, which means when you defeat one, the game rolls for each possible item independently. Gold always drops, but materials like Flame Crest or Furnace Core have their own separate chances. A single kill can technically give you Gold plus multiple materials if you get lucky on all the rolls.
Forest Monsters – Drops and Locations
The forest is your starting area in Wizard Alchemy, and it houses the two easiest monsters in the game. If you just started playing, spend your first few hours here building up Gold and basic materials before venturing toward the beach or mountain.
Pickaxe Dwarf
The Pickaxe Dwarf roams the forest area near the spawn point. This is one of the first enemies you will encounter in Wizard Alchemy, and it has a straightforward melee attack pattern. The Pickaxe Dwarf swings slowly, giving you plenty of time to dodge between hits.
Location: Forest region of Departure Isle, close to the starting area.
Drops: Gold (100%), Flame Crest, Copper Earring.
Difficulty: Easy. The Pickaxe Dwarf has slow, predictable attacks. Dodge sideways when you see the swing animation, then punish with your own attacks during the recovery window. New players can reliably farm these without taking much damage.
The Flame Crest and Copper Earring are useful early-game materials for basic potion recipes. While these drops are not the rarest in Wizard Alchemy, they are consistent enough to make the Pickaxe Dwarf a solid early farming target.
Knife Goblin
The Knife Goblin shares the forest with the Pickaxe Dwarf but tends to spawn slightly deeper in the wooded area. Forum players consistently recommend the Knife Goblin as the best starting monster because its attack pattern is very easy to read and punish.
Location: Forest region, slightly further from spawn than Pickaxe Dwarves.
Drops: Gold (100%), Goblin Finger, Goblin Bone.
Difficulty: Easy. Knife Goblins lunge at you with a quick slash, but the lunge has a telltale wind-up. Step back when you see them raise their knife, then move in after the lunge ends. Their low health pool makes them quick kills even with basic gear.
The Goblin Finger and Goblin Bone are common materials used in early alchemy recipes. If you are working through beginner quests that require goblin materials, the Knife Goblin is your most efficient target.
Beach and Shoreline Monsters – Drops and Locations
Once you have outgrown the forest, head to the beach area to fight stronger variants of the forest monsters. The beach enemies hit harder and have more health, but they also drop similar materials at potentially better quantities. The difficulty jumps from Easy to Medium here, so make sure you have upgraded your gear before making the trip.
Warhammer Dwarf
The Warhammer Dwarf is the beach-dwelling cousin of the Pickaxe Dwarf. It uses a heavy hammer that deals significantly more damage per hit but swings even slower. The tradeoff is that you get more Gold per kill and similar material drops at decent rates.
Location: Beach and shoreline area of Departure Isle.
Drops: Gold (100%), Flame Crest, Copper Earring.
Difficulty: Medium. The Warhammer Dwarf hits much harder than the Pickaxe Dwarf, so you cannot afford to tank hits. The key is watching for the overhead slam animation. When the dwarf raises its hammer above its head, move to the side immediately. The slam has a small area of effect, so create distance rather than trying to dodge through it.
The Warhammer Dwarf drops the same Flame Crest and Copper Earring as the Pickaxe Dwarf, but you earn more Gold per kill. This makes the beach a natural upgrade path once the forest feels too easy.
Archer Goblin
The Archer Goblin is unique because it spawns in both the beach and forest areas, making it one of the most accessible monsters in Wizard Alchemy. This is also the only ranged basic enemy in the game, which changes how you approach combat.
Location: Beach area primarily, but also spawns in forest regions.
Drops: Gold (100%), Goblin Finger, Goblin Bone.
Difficulty: Medium. The Archer Goblin shoots projectiles from range, which means you cannot just stand still and trade hits. You need to close the gap quickly. Use a zigzag movement pattern to dodge arrows while approaching. Once you are in melee range, Archer Goblins are fragile and go down fast. The biggest mistake players make is trying to fight them at range. Always close the distance.
Because the Archer Goblin drops Goblin Finger and Goblin Bone like the Knife Goblin but gives more Gold, it is the natural upgrade for goblin-material farming once you are comfortable dodging arrows.
Mutant Monsters – Rare Drops and Hard-to-Find Locations
The mutant monsters are where Wizard Alchemy monster drops get interesting. These are upgraded versions of the beach and forest enemies, but they spawn in harder-to-reach locations and drop some of the rarest materials in the game. If you want Furnace Core, Dark Shard, or Light Shard, you need to fight mutants.
Forum users consistently report that mutant enemies are significantly harder than their normal counterparts. Bring healing potions before seeking these fights out.
Mutant Warhammer Dwarf
The Mutant Warhammer Dwarf is a powered-up version of the standard Warhammer Dwarf. You will find it in the mountain region of Departure Isle, and it hits much harder while having noticeably more health. The payoff is access to some of the best material drops in the game.
Location: Mountain region of Departure Isle. Look for the elevated terrain area past the beach. The mountain area is identifiable by its rocky, elevated landscape.
Drops: Gold (100%), Furnace Core (14%), Dark Shard (50%), Light Shard (50%).
Difficulty: Hard. The Mutant Warhammer Dwarf retains the slam attack from the normal version but adds faster follow-up swings and more health. You need solid gear and a stock of healing potions. Players on the subreddit recommend at least mid-tier Magic Power before attempting these consistently. The mountain terrain also makes positioning tricky, so be aware of your surroundings during the fight.
The Furnace Core drops at a 14% rate, which means you will get roughly one every 7 kills on average. Dark Shard and Light Shard both drop at 50%, so you will see those frequently. This makes the Mutant Warhammer Dwarf one of the most rewarding monsters for material farming in all of Wizard Alchemy.
Mutant Goblin Archer
The Mutant Goblin Archer is the harder-hitting, tougher version of the standard Archer Goblin. It spawns in a specific location above the Dwarf King Cave, which makes it a bit tricky to find if you do not know where to look.
Location: Above the Dwarf King Cave entrance. Look for the elevated area near the cave opening. The mutant archer patrols this upper zone, so you may need to climb or navigate terrain to reach it.
Drops: Gold (100%), Furnace Core (14%), Dark Shard (50%), Light Shard (50%).
Difficulty: Hard. The Mutant Goblin Archer combines ranged attacks with more health and damage compared to the normal Archer Goblin. The same zigzag approach strategy works, but you need to be faster and more precise. The arrows hit harder, so taking even a few shots can be punishing. Close the gap as quickly as possible and bring healing items.
This mutant shares the exact same drop table as the Mutant Warhammer Dwarf, including the 14% Furnace Core rate and 50% elemental shard rates. If you prefer fighting ranged enemies over melee ones, the Mutant Goblin Archer gives you the same rewards with a different combat style.
Dwarf King Boss – Drops, Location, and Strategy
The Dwarf King is the only boss-tier monster currently in Wizard Alchemy, and it drops some of the most unique items in the game. Located inside the Dwarf King Cave, this boss is the ultimate farming target for experienced players who want exclusive materials like the Dwarf Emblem and Golden Tooth.
Location: Dwarf King Cave. The cave entrance is located on Departure Isle and is identifiable by its large opening with the distinctive giant helmet landmark nearby. Head toward the cave entrance, and the Dwarf King waits inside.
Drops: Gold (100%), Dwarf Emblem, Golden Tooth, Furnace Core.
Difficulty: Elite. The Dwarf King is a significant step up from even the mutant monsters. It has a large health pool, hits very hard, and has multiple attack patterns that you need to learn. Forum players who farm the Dwarf King regularly recommend maxing out your Magic Power and bringing a full inventory of healing potions. Do not attempt this boss until you can comfortably handle mutant enemies.
Strategy: The Dwarf King has a three-phase attack rotation. First, it does a wide swing that covers a large arc in front of it. Dodge backward when you see the wind-up. Second, it performs a ground pound that sends out a shockwave. Jump or move away to avoid the area damage. Third, it throws its weapon in a straight line. Dodge sideways for this one. Learn these three patterns, and the fight becomes repeatable. The recovery window after the ground pound is your best opportunity to deal damage.
Is the Dwarf King worth farming? Yes, especially if you need Dwarf Emblems or Golden Teeth for advanced alchemy recipes. The Gold income is strong, and the chance at Furnace Core makes each kill valuable. Many experienced players run a loop where they kill the Dwarf King, then farm the Mutant Goblin Archer directly above the cave while waiting for the boss to respawn.
Best Farming Guide by Goal – Gold, Materials, and XP
Instead of telling you which monster is universally the best, we broke this section down by what you actually need. Different farming goals call for different targets, and picking the right monster for your current objective saves you hours of grinding.
Best for Gold Farming
Every monster in Wizard Alchemy drops Gold at 100%, but the Gold amount varies by monster. The higher the difficulty, the more Gold you earn per kill. For pure Gold farming efficiency, the Warhammer Dwarf on the beach is the sweet spot between Gold per kill and kill speed. It gives noticeably more Gold than the forest monsters but dies faster than the mutants or boss.
If you can kill mutants quickly, the Mutant Warhammer Dwarf and Mutant Goblin Archer give the best Gold-per-kill ratio. However, if your kill speed is slow, the beach monsters actually give better Gold-per-minute because you can farm them much faster.
Best for Furnace Core Farming
Furnace Core is one of the most sought-after materials in Wizard Alchemy, and only three monsters can drop it. The Mutant Warhammer Dwarf and Mutant Goblin Archer both have a 14% drop rate for Furnace Core. The Dwarf King also drops it, though the exact percentage varies. For dedicated Furnace Core farming, the two mutant monsters are your best bet because they spawn more frequently than the boss and you can kill them faster once you learn their patterns.
Expect roughly one Furnace Core per 7 mutant kills on average. Running a circuit between the Mountain Mutant Warhammer Dwarf and the Mutant Goblin Archer above the Dwarf King Cave is the most efficient Furnace Core farming route currently known.
Best for Dark Shard and Light Shard
Dark Shard and Light Shard drop at 50% from both mutant monsters. These are the highest drop-rate rare materials in Wizard Alchemy, which makes mutant farming very consistent for elemental materials. Half your kills will produce each shard type, so you accumulate them quickly compared to Furnace Core.
If you are building an elemental alchemy setup that requires large quantities of Dark or Light Shards, the mutant enemies are your primary source. No other monsters in the game drop these materials currently.
Best Beginner Farming Monster
The Knife Goblin in the forest is the best monster for brand-new players. It has the easiest attack pattern to learn, low health, and drops Goblin materials that are useful for early-game quests. The Gold income is modest but consistent. Spend your first few dozen kills on Knife Goblins to build confidence, learn combat mechanics, and stock up on basic crafting materials.
Once Knife Goblins feel easy, move to the Pickaxe Dwarf for variety, or head straight to the beach for Archer Goblins if you want a challenge.
Best Mid-Tier Farming Monster
The Archer Goblin is the best mid-tier target because it appears in both forest and beach areas, giving you flexibility in farming routes. The ranged attack forces you to improve your movement skills, which prepares you for the mutant enemies later. The Gold and material income is a clear step up from the forest-only monsters.
Best Endgame Farm
For experienced players with strong gear, the Dwarf King loop is the best endgame farming route. Kill the Dwarf King for Dwarf Emblems, Golden Teeth, and Furnace Core. Then farm the Mutant Goblin Archer above the cave while the boss respawns. This loop covers every valuable drop in the game and maximizes your Gold-per-minute once you can execute it efficiently.
How Drop Pools Work in Wizard Alchemy
Drop pools in Wizard Alchemy work on an independent roll system. When you defeat a monster, the game checks each possible drop separately. Gold always passes its check because it has a 100% rate. Then the game rolls for each material individually, using that material’s specific drop percentage.
This means a single monster kill can yield multiple items. For example, killing a Mutant Warhammer Dwarf guarantees Gold, then has a separate 14% chance for Furnace Core, a 50% chance for Dark Shard, and a 50% chance for Light Shard. In theory, one kill could give you all four items, though that requires getting lucky on every roll simultaneously.
Based on community testing shared on forums, luck stats do not currently appear to affect drop rates in Wizard Alchemy. The percentages are fixed per monster type. What does matter is kill speed. The faster you defeat monsters, the more rolls you get per minute, which directly increases your material income over time.
Monster respawn timing is relatively quick in Wizard Alchemy. Monsters respawn in the same locations after a short delay. Farming a circuit of multiple spawn points is more efficient than waiting at a single location, since you can continuously fight without downtime.
Combat Tips and Monster Hunting Strategies
Fighting efficiently in Wizard Alchemy comes down to understanding enemy patterns and optimizing your movement. Here are the strategies that will speed up your farming runs.
- Against melee enemies (Dwarves): All dwarf-type monsters use swing or slam attacks with visible wind-up animations. The counter is consistent: wait for the wind-up, dodge to the side, and attack during the recovery animation. The recovery window is your damage window. Never trade hits with dwarves, especially the Warhammer and Mutant variants that hit extremely hard.
- Against ranged enemies (Goblin Archers): The number one rule is to close the gap immediately. Fighting at range against archers wastes time and risks taking unnecessary damage. Move in a zigzag pattern to throw off their aim, then punish them in melee range where they are weakest. Normal Archer Goblins go down in a few hits once you reach them.
- Healing potion management: Always carry healing potions when fighting beach monsters or harder. For mutant enemies and the Dwarf King, bring a full stack. The Gold you spend on potions is easily earned back from the kills themselves. Running out of potions mid-fight against a mutant is the most common cause of death reported by players.
- Route planning: The most efficient farming routes move between multiple spawn points. For early game, circle between Pickaxe Dwarf and Knife Goblin spawns in the forest. For mid-game, loop between the beach Warhammer Dwarf and Archer Goblin. For endgame, use the Dwarf King Cave loop described earlier.
FAQs
What monster drops Furnace Core in Wizard Alchemy?
The Mutant Warhammer Dwarf and Mutant Goblin Archer both drop Furnace Core at a 14% rate. The Dwarf King boss also drops Furnace Core. For the most efficient farming, target the two mutant enemies since they spawn faster than the boss and you can kill them more quickly.
Where is the Dwarf King located in Wizard Alchemy?
The Dwarf King is located inside the Dwarf King Cave on Departure Isle. Look for the cave entrance marked by a distinctive giant helmet landmark nearby. The boss waits inside the cave.
Which monster drops Dark Shard or Light Shard in Wizard Alchemy?
Both the Mutant Warhammer Dwarf (Mountain region) and the Mutant Goblin Archer (above Dwarf King Cave) drop Dark Shard and Light Shard at a 50% rate each. These are the only monsters in the game that drop elemental shards.
What is the best beginner monster to farm in Wizard Alchemy?
The Knife Goblin in the forest is the best beginner monster. It has easy-to-read attack patterns, low health, and drops Goblin Finger and Goblin Bone which are useful for early quests. The Gold income is consistent, making it perfect for new players learning combat.
Do all monsters in Wizard Alchemy drop Gold?
Yes, every monster in Wizard Alchemy drops Gold at a 100% rate. The amount of Gold varies by monster difficulty, with harder monsters giving more Gold per kill. The Dwarf King boss gives the highest Gold per kill.
Where can I find mutant enemies in Wizard Alchemy?
The Mutant Warhammer Dwarf spawns in the Mountain region of Departure Isle. The Mutant Goblin Archer spawns on the elevated area directly above the Dwarf King Cave entrance. Both are significantly harder than normal monsters and require healing potions.
Wrapping Up Your Wizard Alchemy Monster Guide
That covers every monster drop and location currently available in Wizard Alchemy for 2026. The 7 monsters on Departure Isle follow a clear difficulty progression from the easy forest enemies up to the Dwarf King boss. Each one fills a specific role in your farming journey, whether you need Gold, Goblin materials, elemental shards, or the coveted Furnace Core.
The key takeaways from our farming sessions: start with Knife Goblins in the forest, graduate to beach monsters for better Gold, and push into mutant territory once your gear and skills are ready. For endgame players, the Dwarf King cave loop is the most efficient farming route in the game. Focus on kill speed over anything else, since more kills means more drop rolls per minute.
We will keep this guide updated as Wizard Alchemy adds new monsters or changes drop rates. Check back for the latest information, and happy farming on Departure Isle.