
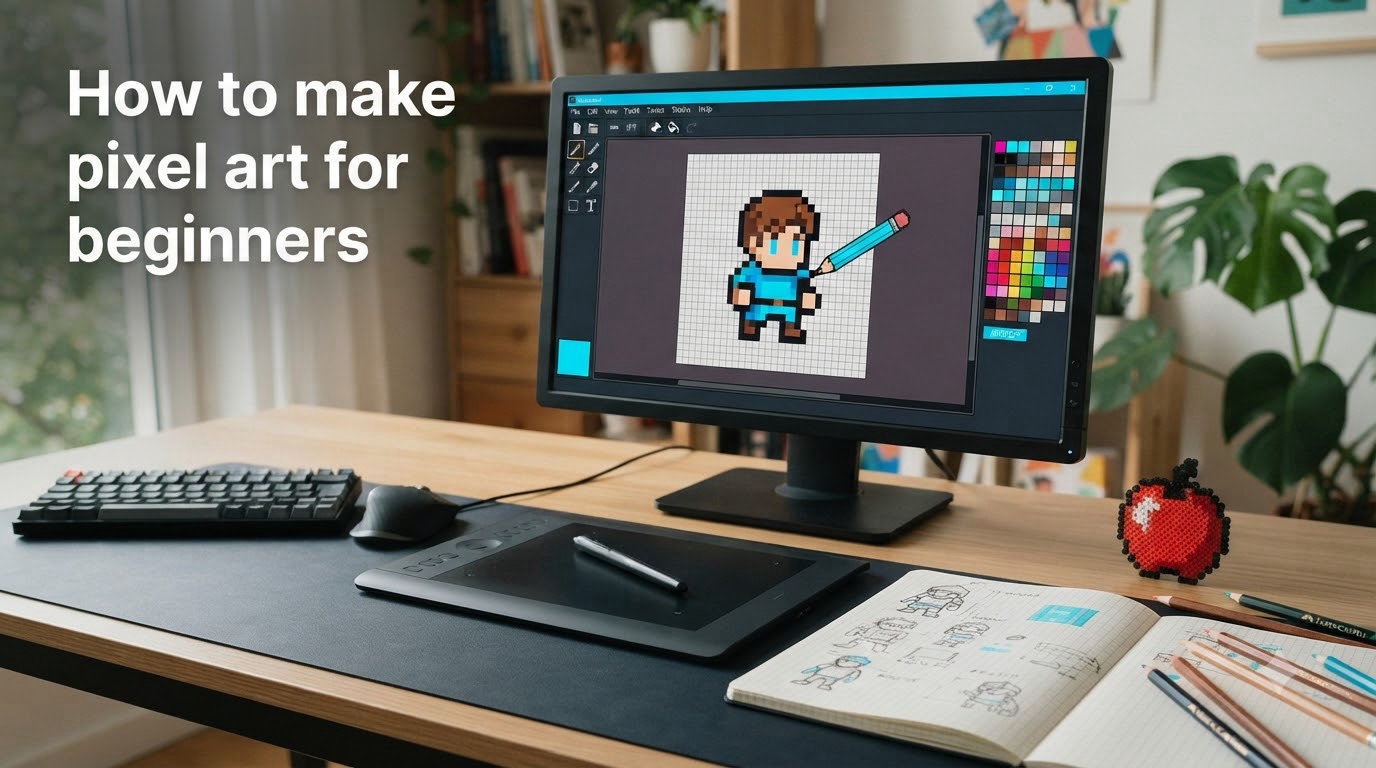
If you have ever looked at a retro game and thought “I wish I could make something like that,” you are in the right place. Learning how to make pixel art for beginners is not as complicated as it seems. You do not need a fancy drawing tablet or years of art school experience to get started.
Pixel art is one of the most approachable forms of digital art because it works within tight constraints. Instead of worrying about brush pressure or color blending, you focus on placing individual pixels on a grid. That limitation is exactly what makes it so satisfying to learn.
In this guide, I am going to walk you through everything you need to know to start creating your own pixel art. We will cover the best free software, core techniques like outlining and shading, a complete step-by-step first sprite tutorial, and practice exercises you can start today. By the end, you will have created your first 16×16 character sprite.
I have spent months practicing pixel art, reading through community forums on r/PixelArt and PixelJoint, and studying tutorials from artists who have been doing this for years. This guide pulls together the most important lessons so you can skip the trial and error and start making art you are proud of.
Table of Contents
What Is Pixel Art?
Pixel art is a form of digital art where images are created one pixel at a time on a grid. Every single dot on the canvas is placed intentionally by the artist. Unlike other digital art forms that use smooth brush strokes and gradients, pixel art embraces the visible square shape of each pixel as part of its aesthetic.
The art form was born out of necessity. Early computers and game consoles had extremely limited graphical capabilities. Artists working on games for the NES, SNES, and arcade machines had to create recognizable characters and environments using tiny grids of color. Games like Super Mario Bros., The Legend of Zelda, and Final Fantasy pushed the boundaries of what was possible with just a handful of pixels.
Today, pixel art is experiencing a massive revival. Indie games like Celeste, Stardew Valley, and Undertale have proven that pixel art can deliver emotionally resonant experiences. The style has also found a home on social media, where artists share animated sprites, character designs, and game mockups daily.
What makes pixel art different from simply resizing a regular image to be small is the intentionality. Every pixel is placed by hand. The artist controls exactly where each color goes, which gives pixel art its distinctive clean and readable look even at tiny resolutions.
Best Pixel Art Software for Beginners
One of the best things about starting pixel art is that you probably already have everything you need. A computer and a mouse are enough to begin. Here are the software options I recommend, starting with the most beginner-friendly.
Piskel (Free, Browser-Based)
Piskel is the easiest way to start making pixel art right now. It runs in your web browser, so there is nothing to download or install. The interface is simple with just the tools you need: a pencil, a fill bucket, a color picker, and a mirror tool. It also includes basic animation support, which is great when you are ready to make your sprites move.
I recommend Piskel as your starting point because it removes every possible barrier. Open your browser, go to piskelapp.com, and start drawing. When you outgrow it, you can move on to something more powerful.
Aseprite (Paid, or Free if You Compile It)
Aseprite is the industry standard for pixel art. Nearly every professional pixel artist uses it, and for good reason. It has tools specifically designed for pixel art: onion skinning for animation, palette management, tilemap support, and keyboard shortcuts that speed up your workflow significantly.
Aseprite costs around $20 on Steam or directly from the developer. However, the source code is available on GitHub, and you can compile it yourself for free. The community on r/aseprite has guides for compiling it on Windows, Mac, and Linux. It takes about 30 minutes and saves you the cost.
If you are serious about pixel art, Aseprite is worth every penny. The layers system, animation timeline, and export options make it far more capable than any free alternative.
LibreSprite (Free, Open Source)
LibreSprite is a free fork of an older version of Aseprite. It shares much of the same interface and functionality, making it a solid middle ground between Piskel and paid Aseprite. If you want something closer to the Aseprite experience without paying, this is your best bet.
GraphicsGale (Free, Windows Only)
GraphicsGale has been around for years and remains a capable free option for Windows users. It handles animation well and has a straightforward interface. The main downside is that it is Windows only and the interface feels dated compared to modern alternatives.
My recommendation: start with Piskel to get comfortable. Once you find yourself wanting more control and better tools, switch to Aseprite (compiled from source if you want it free). That is the path most pixel artists take.
How to Make Pixel Art for Beginners: Setting Up Your Canvas
Before you place a single pixel, you need to set up your canvas correctly. This is a step many beginners skip, and it causes problems later.
Start Small: 16×16 Is Your Best Friend
When you first open your pixel art software, you might be tempted to create a large canvas. Resist that urge. The single most important advice for beginners is to start with a 16×16 pixel canvas.
A 16×16 grid gives you 256 pixels to work with. That sounds tiny, but it forces you to think about what matters most in your design. You learn to make every pixel count. Community members on r/PixelArt consistently say that 16×16 is the sweet spot for beginners. It is small enough to be manageable but large enough to create recognizable characters and objects.
Common canvas sizes and when to use them:
8×8 – Extremely limited. Good for tiny icons or extreme challenges. Not recommended for learning.
16×16 – The ideal starting size. Enough room for simple characters, items, and enemies.
32×32 – The next step up. Good for detailed characters and environmental objects once you are comfortable with 16×16.
64×64 – Intermediate level. Allows for significant detail but can feel overwhelming for a beginner.
96×96 and above – Advanced. Save these for when you have mastered the fundamentals.
Set your canvas zoom level to at least 800% so you can clearly see each individual pixel. Most pixel art software defaults to a high zoom, but if yours does not, zoom in until the grid is clearly visible.
Basic Pixel Art Techniques: Outline, Color, and Shading
These five steps form the foundation of every pixel art piece you will ever make. I am breaking them down in order so you can follow along as you create your first sprite.
Step 1: Block In the Silhouette
Start by filling in the basic shape of your subject using a single dark color. Do not worry about details or colors yet. You are just trying to create a recognizable silhouette. If someone can tell what your subject is just from this solid shape, you have a strong design.
This step is critical because a readable silhouette is the backbone of good pixel art. Game sprites are often displayed small on screen, so players need to identify characters instantly. The same principle applies whether you are making game assets or standalone art pieces.
Step 2: Draw the Outline
Once your silhouette looks right, trace around the edges with an outline. Use the pencil tool set to a single pixel width. The goal here is clean, smooth lines that follow the shape of your silhouette.
At this stage, watch out for “jaggies.” Jaggies are jagged, uneven edges that happen when pixels are placed in ways that create awkward diagonal lines. A clean diagonal line in pixel art should progress in a consistent pattern, like two pixels right, one pixel down, repeating evenly. Inconsistent patterns create visual noise that makes your art look messy.
Step 3: Choose Your Color Palette
For your first few pieces, stick with a limited palette of 4 to 6 colors. Using too many colors is one of the most common beginner mistakes. A tight palette forces you to be creative with shading and makes your art look cohesive.
I highly recommend browsing Lospec.com/palette-list for pre-made color palettes. These palettes are created by experienced pixel artists and are optimized for pixel art. Some popular beginner-friendly palettes include the PICO-8 palette (16 colors) and the Endesga 32 palette.
When selecting colors, think about your light source. You will want at least two shades for each color in your design: a lighter shade for areas hit by light and a darker shade for shadow areas. Adding a third mid-tone shade gives you even more control over form and depth.
Step 4: Fill In Flat Colors
Use the fill bucket tool to fill each outlined area with its base color. Keep your color choices consistent across your entire sprite. If you are using three shades of blue for a character’s outfit, make sure you apply them logically based on where the light is coming from.
This step is about establishing the color zones before you add any shading. Think of it like coloring in a coloring book. Stay within the outlines and keep your colors clean.
Step 5: Apply Shading and Highlights
Pick a light source direction before you start shading. The most common choice is top-left, which is a convention from classic pixel art games. Once you have chosen your light direction, shade consistently throughout the entire piece.
Place shadow colors on the side opposite your light source. Place highlight colors on the side facing the light. The mid-tone colors go in between. This creates the illusion of three-dimensional form on a flat grid of pixels.
For highlights, use just one or two pixels of a brighter color on areas where light would hit most directly. A small bright pixel on the top of a rounded shape can make it look spherical. For shadows, cluster darker pixels along the bottom edges of shapes to ground them and create depth.
How to Make Your First Pixel Art Sprite (Step by Step)
Now let us put all those techniques together into a complete tutorial. I will walk you through creating a simple 16×16 character sprite from scratch. Open your pixel art software and follow along.
Step 1: Create a New 16×16 Canvas
Open your chosen software and create a new canvas set to 16 pixels wide by 16 pixels tall. Set the background to a neutral color like a medium gray so you can see both light and dark pixels clearly. Zoom in to at least 800%.
Step 2: Draw the Silhouette
Select a single dark color and use the pencil tool to block in the shape of a simple character. Think of a basic fantasy character: a head on top, a body in the middle, and short legs at the bottom. Keep it simple. You are aiming for something that looks like a tiny game character, not a detailed portrait.
A good starting shape for a 16×16 character: use about 4 pixels wide for the head, 5-6 pixels wide for the body, and 3-4 pixels for the legs. The total height should be about 12-14 pixels, leaving a pixel or two of space at the top and bottom.
Step 3: Clean Up the Outline
Trace around the edge of your silhouette with an outline color. I usually use a very dark color or pure black for the outline. Make sure your lines are smooth and consistent. Check every diagonal line for jaggies and fix any uneven pixel patterns.
Step 4: Apply Base Colors
Pick three color groups: one for the skin, one for the clothing, and one for the hair or helmet. Use just 2 or 3 shades per color group. Fill in the outlined areas using the fill bucket tool. At this point, your sprite should look flat but recognizable.
Step 5: Add Shading
Decide that your light source is coming from the top-left. Replace the base colors in shadow areas (bottom-right portions) with darker shades. Add a few highlight pixels on the top-left portions of each shape. Just a couple of well-placed pixels of a brighter shade can transform a flat shape into something with volume.
Step 6: Final Details and Clean-Up
Add tiny details like eyes (usually just 1 or 2 pixels each), a mouth line, or a belt. Remember that at 16×16, every pixel is significant. One extra pixel can change the expression on a character’s face. Zoom out to 100% view periodically to check how your sprite looks at actual size. This is how players would see it in a game.
When you are happy with your sprite, export it as a PNG file. PNG is the standard format for pixel art because it preserves crisp edges. Never use JPG for pixel art because the compression will blur your carefully placed pixels.
Anti-Aliasing and Dithering: Next-Level Techniques
Once you are comfortable with the basics, these two techniques will elevate your pixel art to the next level. You do not need them for your first sprites, but understanding them early helps you recognize them in other artists’ work.
What Are Jaggies?
Jaggies are the jagged, stair-stepped edges that appear on diagonal lines and curves in pixel art. They happen when pixels are placed in a way that creates an inconsistent or uneven pattern. Even experienced artists create jaggies on their first pass. The process of cleaning them up is a standard part of the pixel art workflow.
Anti-Aliasing Basics
Anti-aliasing is the technique of placing intermediate-colored pixels along diagonal or curved lines to smooth out jagged edges. Instead of a harsh transition between two colors, you place one or two pixels of a blended color in between. This creates the illusion of a smoother line when viewed at normal size.
The key with anti-aliasing in pixel art is restraint. Adding too many intermediate pixels makes edges look blurry and defeats the purpose of pixel art’s crisp aesthetic. A single well-placed anti-aliasing pixel can smooth a curve beautifully. Two or three in the wrong spot will make it look muddy.
Dithering Introduction
Dithering is the technique of alternating pixels of two different colors in a pattern to create the appearance of a third, blended color. When you view a dithered area from a distance (or at 100% zoom), your eyes blend the alternating pixels together into a new shade.
Classic dithering patterns include checkerboard (alternating pixels like a chess board) and gradient patterns that transition smoothly from one color to another. This technique was essential in early game art when hardware could only display a limited number of colors on screen at once.
For beginners, I suggest learning to recognize dithering in classic games like Ecco the Dolphin or the PC-98 library before attempting it in your own work. Use it sparingly. Heavy dithering can make your art look noisy if you are not careful with the patterns.
Common Pixel Art Mistakes Beginners Make
After browsing through hundreds of posts on r/PixelArt and reviewing feedback from experienced artists, these are the mistakes that come up most often. Knowing about them in advance will save you weeks of frustration.
Starting With a Canvas That Is Too Big
This is the number one mistake. Beginners see professional pixel art at 128×128 or larger and think they need to work at that scale. At large sizes, you end up spending hours on a single sprite and the result often looks muddy because you have not yet developed the skill to use every pixel effectively. Start at 16×16. Move up only when you feel like you are running out of room to express your ideas.
Using Too Many Colors
New pixel artists tend to add a new shade every time they need a slightly different tone. Before long, a 16×16 sprite has 30 colors and looks chaotic. Stick with a small palette. Six to eight colors total is plenty for a beginner piece. The constraint will make your art look more cohesive and professional.
Inconsistent Light Source
Shading one part of your sprite as if light comes from the left and another part as if light comes from the right is a dead giveaway of a beginner. Pick one light source direction at the start and commit to it throughout the entire piece. Top-left lighting is the most common convention.
Not Using Reference Art
Pulling references from classic games and real pixel art is not cheating. Every professional pixel artist uses references. Study how sprites in games like Super Mario Bros. 3, Pokemon, or Metal Slug handle shading, outlines, and color choices. Analyzing existing pixel art is one of the fastest ways to improve your own skills.
Spending Too Long on One Sprite
Forum threads on r/gamedev consistently mention this issue. Beginners spend 5 or more hours on a single sprite trying to make it perfect, when they would learn faster by making 20 simpler sprites in the same time. Quantity leads to quality in the early stages. Aim for speed and repetition over perfection.
Pixel Art Practice Exercises for Beginners
This section is something I noticed no other pixel art guide covers, but it is one of the most requested topics on community forums. Artists on r/PixelArtTutorials constantly ask “what should I be practicing?” Here is a structured plan you can follow.
Why Daily Practice Matters
Community feedback from PixelJoint and Reddit consistently shows that daily practice beats intense sporadic sessions. Spending 20 minutes a day on pixel art will produce better results than spending 5 hours once a week. The repetition builds muscle memory for pixel placement and color selection.
If you want structured daily prompts, look up Pixel Dailies on Twitter and Discord. Each day, a new theme is posted and artists of all skill levels create pixel art based on that theme. Participating gives you practice and community feedback at the same time.
Week 1: Simple Objects
Spend your first week drawing single objects at 16×16. Focus on recognizable shapes with clean outlines and basic shading. Try these subjects, one per day:
Day 1: An apple (practice curves and highlights)
Day 2: A sword (practice straight lines and symmetry)
Day 3: A potion bottle (practice transparency and liquid effects)
Day 4: A tree (practice organic shapes and multiple greens)
Day 5: A chest or treasure box (practice perspective and metallic shading)
Day 6: A shield (practice circular shapes and detail work)
Day 7: Recreate a classic game item from memory (practice using reference art)
Week 2: Simple Characters
Move on to small character sprites at 16×16. These are more challenging because they require you to convey personality and expression in very few pixels.
Day 1: A basic knight with helmet and sword
Day 2: A wizard with a pointed hat
Day 3: A slime enemy (simple blob shape, great for shading practice)
Day 4: A cat or small animal
Day 5: A village NPC (simple villager)
Day 6: A boss character (slightly more detailed, still at 16×16)
Day 7: Design an original character of your own
Week 3: Environment Pieces and Tilesets
Now practice tiles that could fit together to create a game environment. This teaches you about visual consistency and how pieces work as a set rather than standalone art.
Day 1: A grass tile (16×16, seamless)
Day 2: A dirt or stone path tile
Day 3: A wall tile (brick or stone pattern)
Day 4: A water tile with simple animation frame
Day 5: A tree or bush that sits on top of your grass tile
Day 6: A house exterior using your wall tile style
Day 7: Assemble a 4×4 tile scene combining everything you made this week
Getting Feedback on Your Work
Posting your pixel art and receiving feedback is essential for growth. The community on r/PixelArt is welcoming to beginners and regularly offers constructive criticism. PixelJoint also has a forum where you can post work-in-progress pieces. When asking for feedback, be specific about what you want help with. Instead of “what do you think?”, ask “does the shading on this character read correctly?” or “are my outlines too thick?”
FAQs
How do I make my own pixel art?
To make your own pixel art, download free software like Piskel (browser-based) or Aseprite, create a small 16×16 canvas, and start placing pixels using the pencil tool. Follow the basic workflow: block in a silhouette, draw an outline, fill in flat colors, then add shading with a consistent light source. Export your finished art as a PNG file to preserve crisp pixel edges.
Is pixel art hard for beginners?
Pixel art is one of the most accessible forms of digital art for beginners. You do not need a drawing tablet or prior art experience. The small canvas sizes (16×16) actually make it easier to manage because you have fewer decisions to make. Most beginners can create a recognizable sprite within their first hour of practice. The key is starting small and practicing consistently rather than trying to create complex art right away.
Can ChatGPT do pixel art?
ChatGPT and other AI language models cannot directly create pixel art images. However, AI image generators like DALL-E and Midjourney can produce pixel-art-style images from text prompts. These AI-generated images are not true pixel art because the pixels are not placed intentionally by an artist. If your goal is to learn the craft of pixel art, AI tools can be useful for generating reference ideas, but the actual pixel-by-pixel creation process requires pixel art software and manual work.
What are common pixel art mistakes?
The most common pixel art mistakes for beginners include: starting with a canvas that is too large (stick to 16×16), using too many colors (limit yourself to 6-8 total), having an inconsistent light source when shading, not cleaning up jagged edges (jaggies) on outlines, skipping the silhouette check, spending too long perfecting a single sprite instead of practicing quantity, and not using reference art from professional pixel art games.
How long does it take to learn pixel art?
You can create your first recognizable pixel art sprite within an hour of starting. Developing solid fundamentals takes about 2 to 3 months of consistent daily practice (20-30 minutes per day). Reaching an intermediate level where you can create polished game-ready sprites and simple animations typically takes 6 to 12 months. Like any art form, mastering pixel art is an ongoing process that continues to reward practice over years.
What is the best free pixel art software?
Piskel is the best free pixel art software for absolute beginners because it runs in your browser with no installation required. For more advanced features without cost, LibreSprite (a free fork of Aseprite) or compiling Aseprite from source code on GitHub are excellent options. GraphicsGale is another capable free option, but it is limited to Windows.
Learning how to make pixel art for beginners comes down to three core principles: start with a small canvas, practice daily, and study reference art from games you admire. You do not need expensive tools or natural artistic talent. You need a free pixel art editor, a 16×16 canvas, and the willingness to place pixels one at a time until something recognizable emerges.
Your next step is simple. Open Piskel right now, create a 16×16 canvas, and try drawing a basic apple or sword using the silhouette-to-shading workflow I described above. Your first sprite will not be perfect, and that is the point. Every professional pixel artist started with rough, messy first attempts. The only difference between them and you is hours of practice.
Join communities like r/PixelArt on Reddit or participate in Pixel Dailies to stay motivated and get feedback. Pixel art is a skill that rewards consistency over intensity. Twenty minutes a day for a month will produce dramatically better results than a single marathon weekend session.